
User Guide
Create a New Discovery Scan
Overview
-
The purpose of a Discovery scan is to discover the data that is assigned to the scan, but not manipulate the data discovered by the scan.
-
Discovery scans are performed by one or more agents. Multiple Agents are called Discovery Teams. See Spirion Sensitive Data Platform: Architecture, Security, and Data Flow.
-
A Discovery scan is similar to a Sensitive Data scan except that it does not require a Playbook.
-
Discovery scans capture metadata only.
How to Create a New Discovery Scan
To create a new Discovery scan, use the following steps:
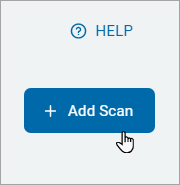
- Navigate to Scans > All Scans.
- In the top right of the screen, click Add Scan.
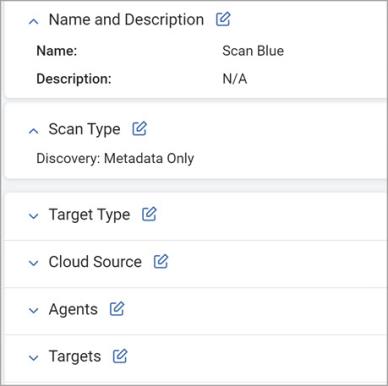
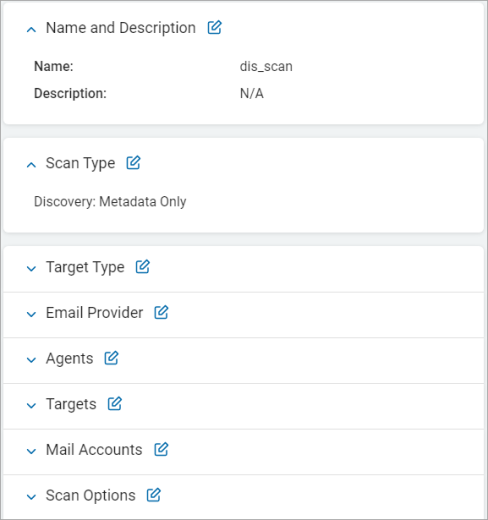
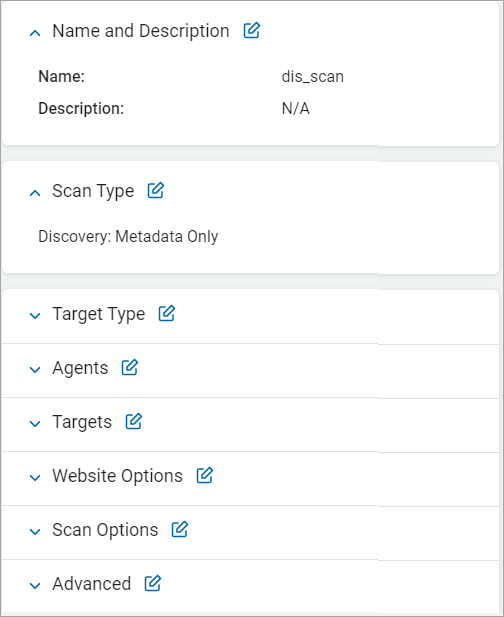
- Fill in the Name and Description (description is optional).
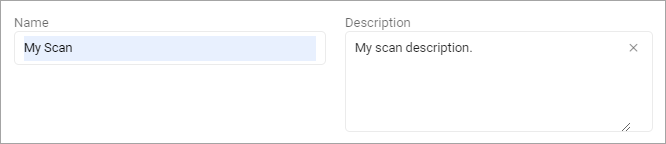
- Click Next to proceed or Exit Without Saving to discard.
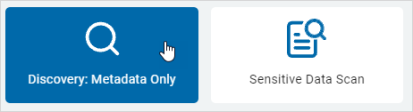
- Click the Discovery: Metadata Only tile.
- Select the Target Type to scan.
Expand a section for more information:
Create a Cloud Scan
Procedure:
- Click the Cloud tile.

- On the Select which cloud service to scan screen, to select click a cloud service tile:
- Dropbox
- Google Drive
- Box
- OneDrive for Business
- Amazon S3

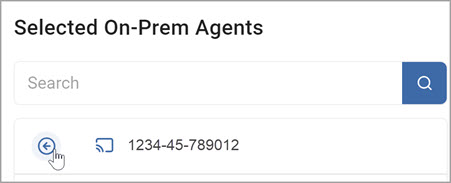
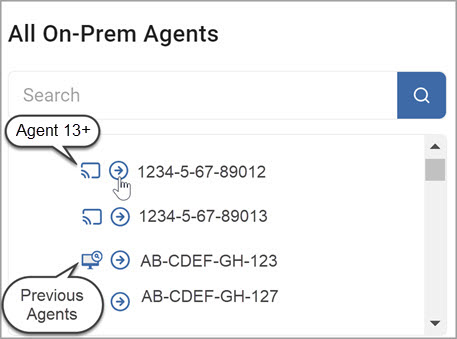
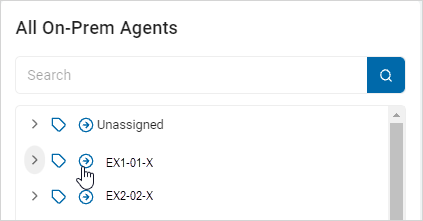
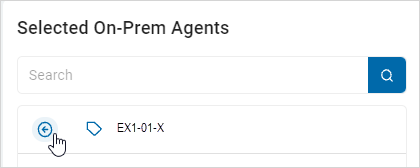
- On the Select the agent(s) to perform the scan screen, choose the agents you want to use:
- Click the chevron (>) icon to expand a section.
- To add an Agent to the Selected section, click the arrow next to the agent name.
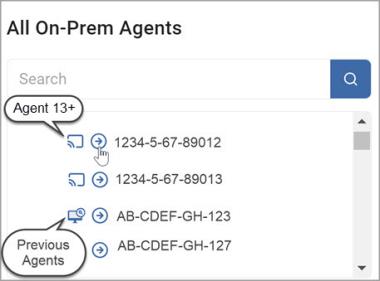
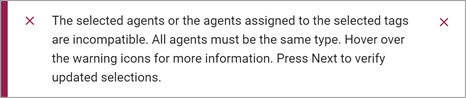
Note: Agent 13, Agent 13.1, and Legacy Agents cannot be combined.
If you select more than one version of the agents, you will get an error message and be prompted to reselect your agents.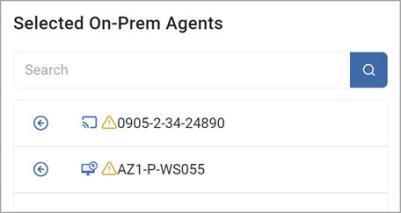
- To remove an Agent, click the arrow next to the agent name.
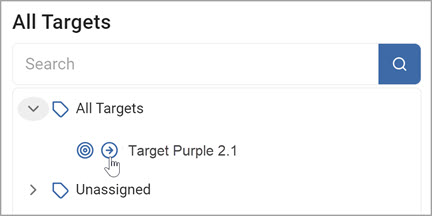
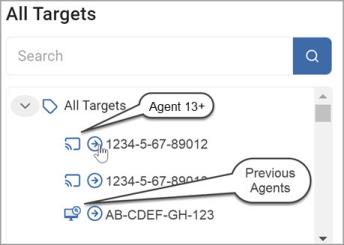
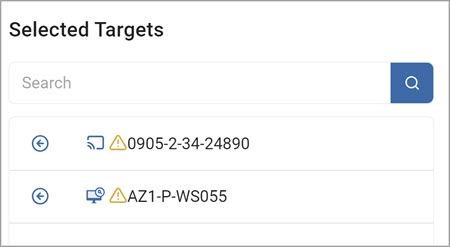
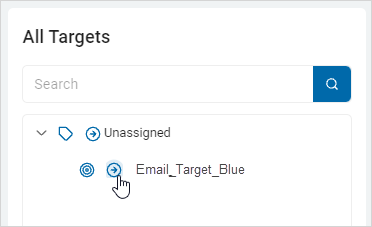
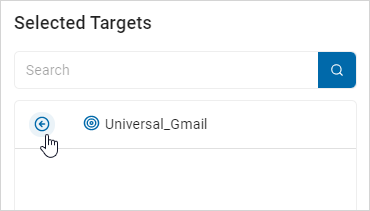
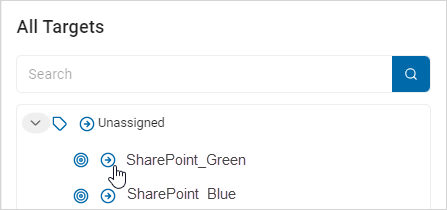
- On the Select targets(s) to scan screen, click the chevron (>) icon to expand any section.
- Select one or more targets to scan:
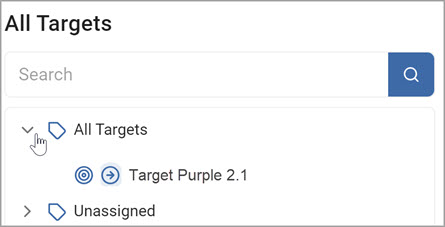
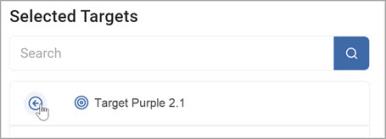
- To add a Target, click the arrow next to the target name.
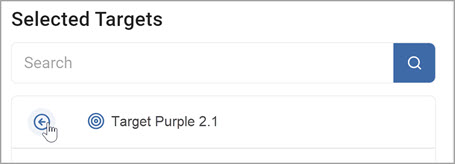
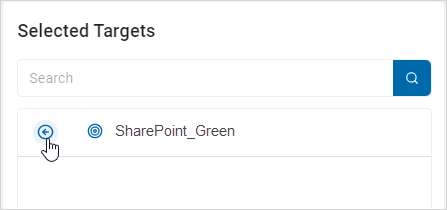
- To remove a target from the Selected Targets section, click the arrow next to the target name.
Note: To create a new Target, see Working with Assets and Targets.
-
Click Next to proceed, Previous to return to the previous screen, or Exit Without Saving
to discard. -
On the Select which user accounts to scan screen:
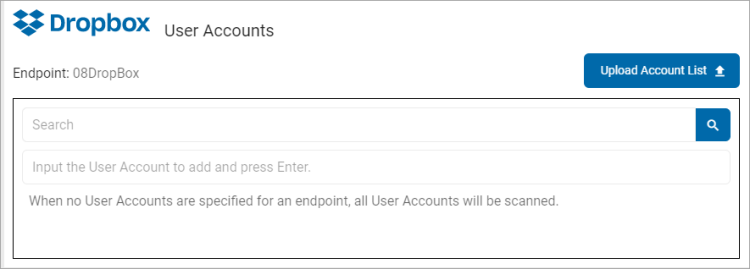
Note: Your cloud source company is reflected on this screen.
However, the screen does not display for Amazon S3 cloud services.- Search: To search for a User Account, type the name in the box and click the lens icon or click Enter.
- Input the User Account to add and press Enter: Type the user account name and click Enter.
- Upload Account List: To upload a list of accounts from your local computer, click the upload icon and locate the file on your computer.
- Click Next to proceed, Previous to return to the previous screen, or Exit Without Saving
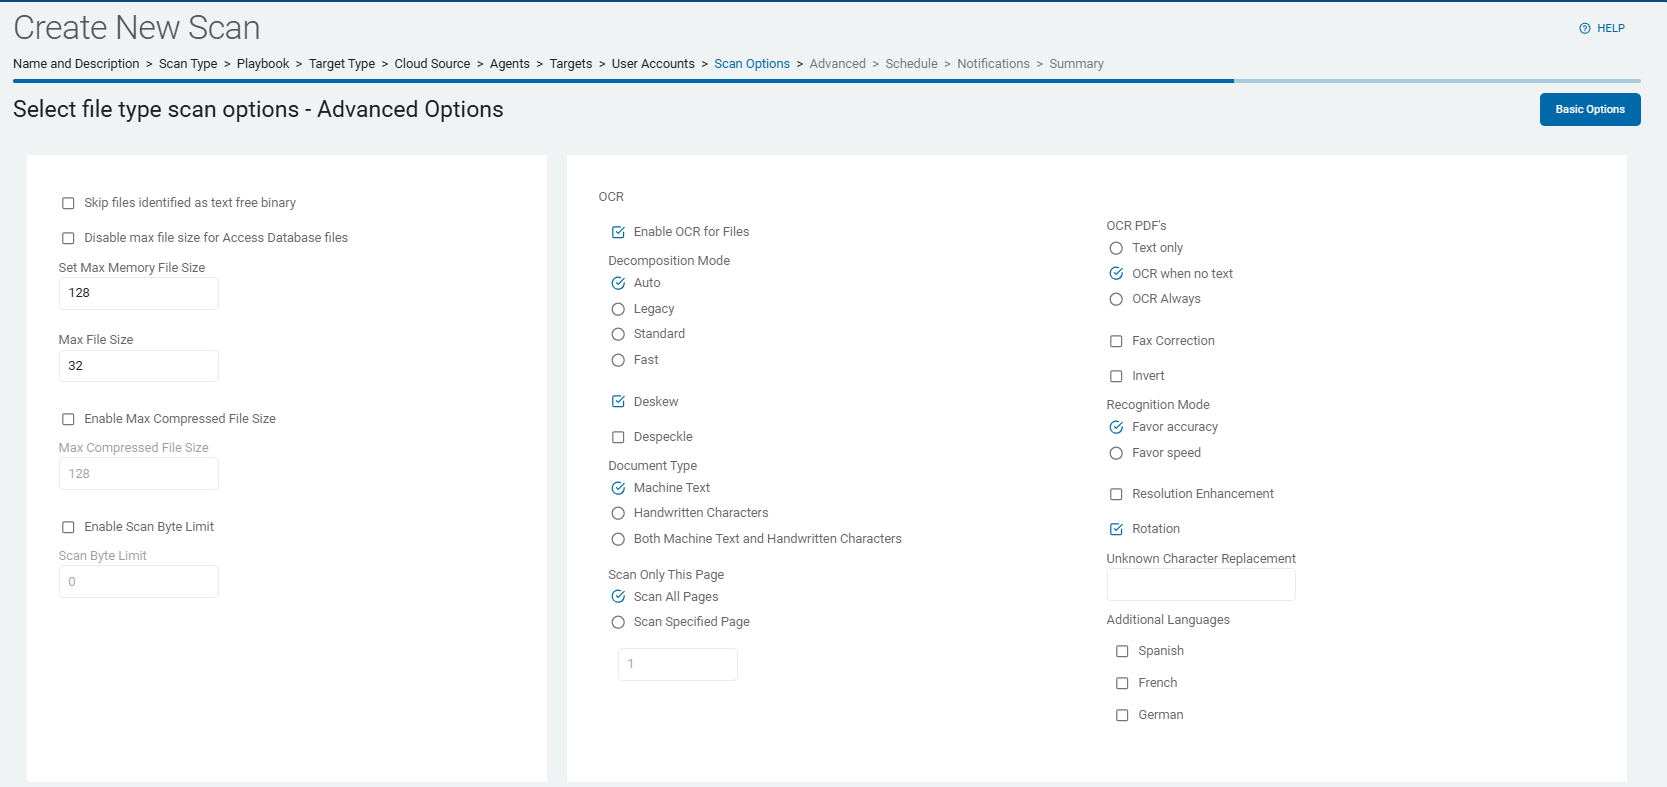
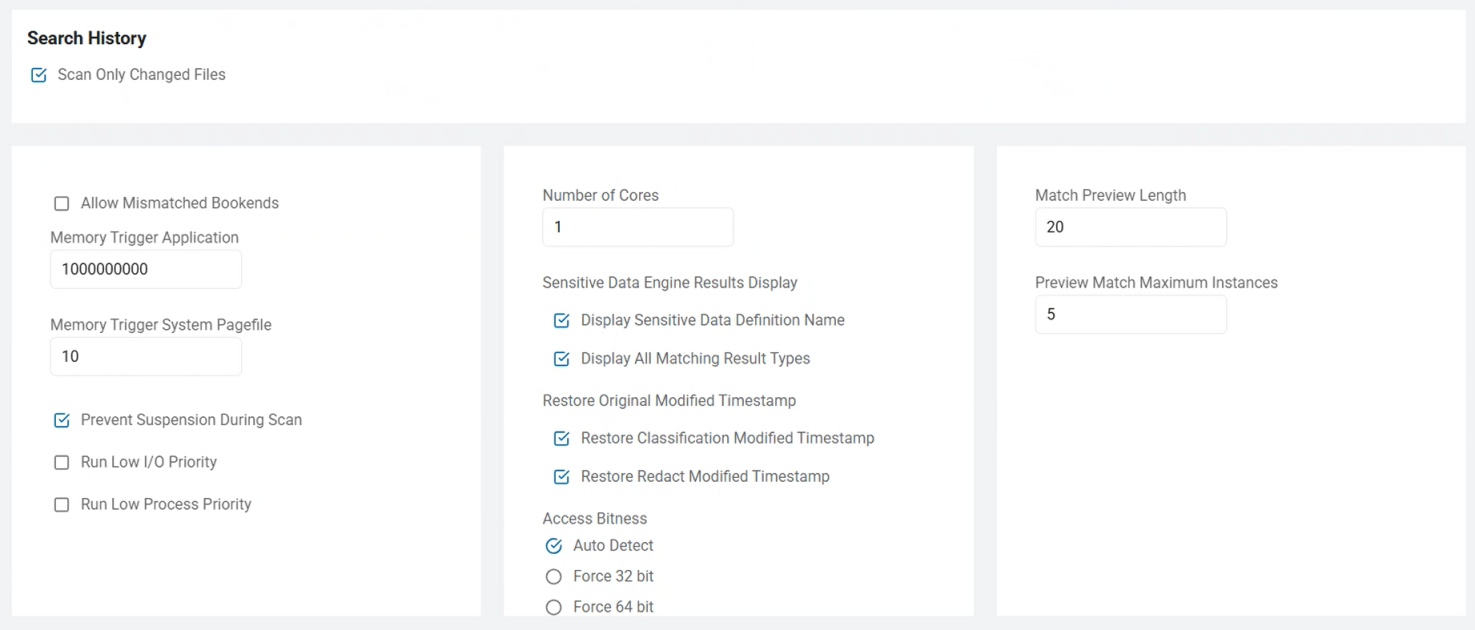
to discard. - On the Select file type scan options screen:
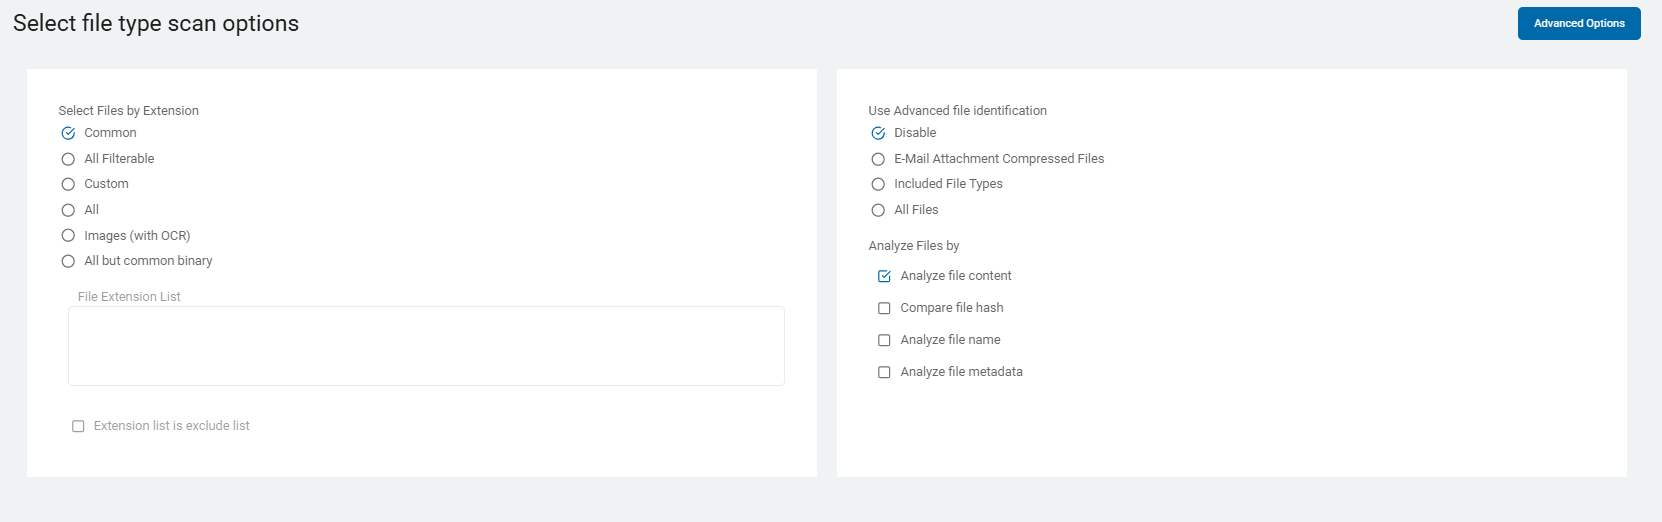
- For descriptions and details about these options see Scan Options.
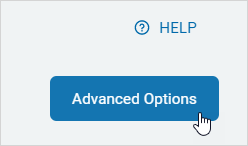
- Click the Advanced Options button in the top right corner of the screen to add additional options or click the Basic Options button to return to the previous screen.
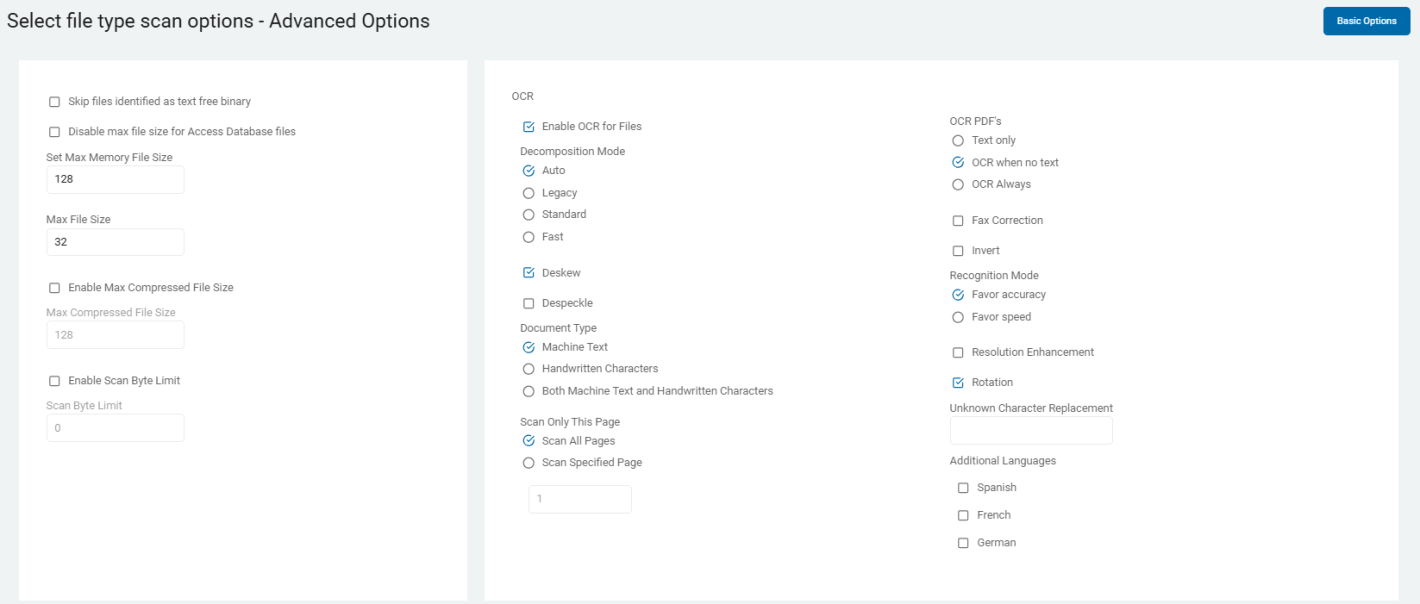
- On the Select file type scan options - Advanced Options screen:

These options are also described and detailed in Scan Options.
-
Click Next to proceed, Previous to return to the previous screen, or Exit Without Saving
to discard. -
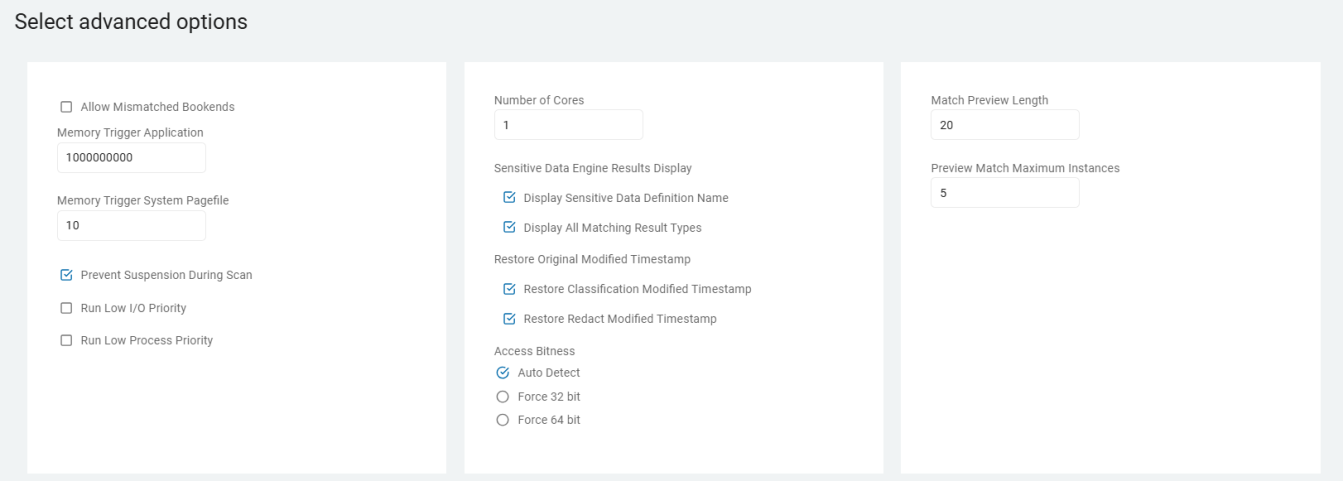
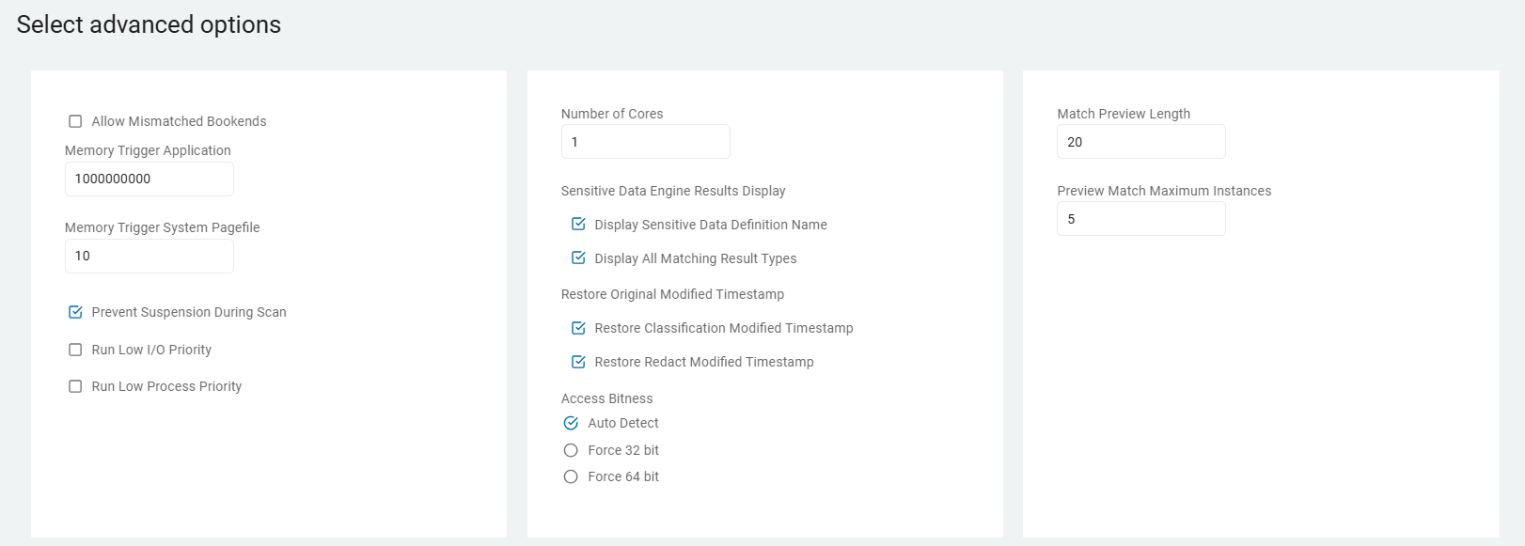
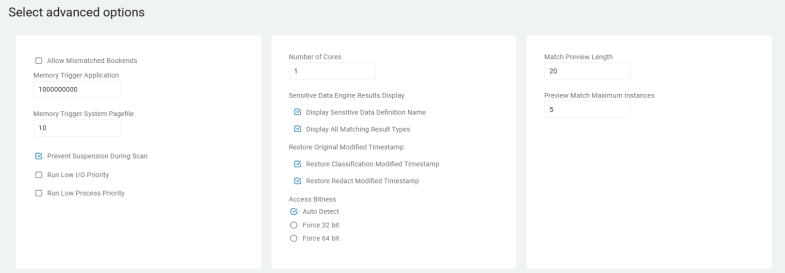
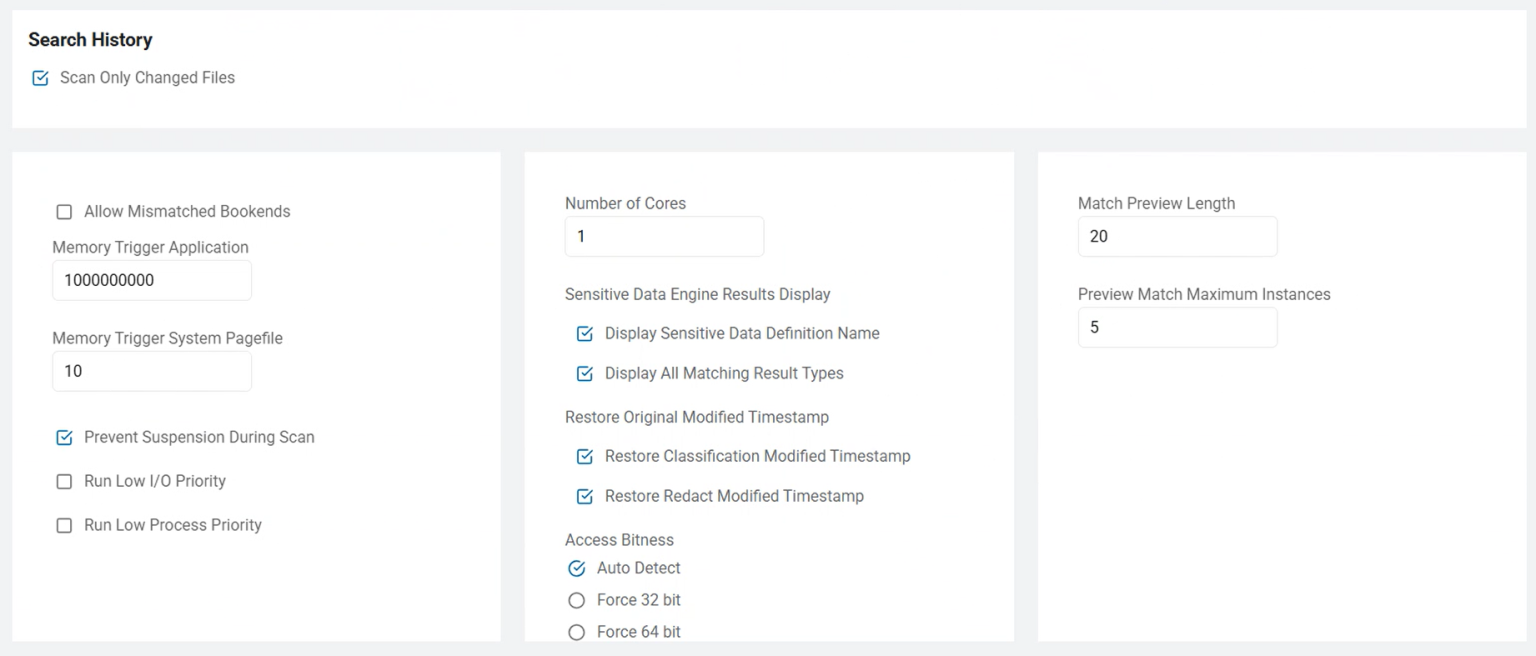
On the Select advanced options screen more options are available:

These options are described and detailed in Scan Options.
Note: Send Match and Send Only Last Four Characters options only display if Sensitive Data Finder feature is disabled.
-
Click Next to proceed, Previous to return to the previous screen, or Exit Without Saving
to discard. -
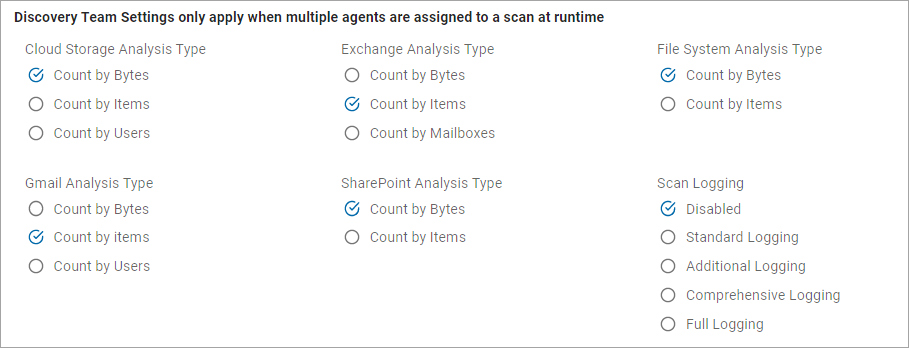
On the Discovery Team Settings screen, you can configure the team settings.
Note: This screen only displays when multiple On-Prem agents are selected.

Agent 13.0+
Ensure these ports are open:
-
Port 5672:
Use these settings:-
Open for Inbound TCP communication on the Discovery Agent
-
Open for Outbound TCP communication on ALL other agents involved in the same scan to the Discovery Agent.
NOTE: This communication is for reading and writing information to the message queue.
-
-
Port 15672:
Use these settings:-
Open for Inbound TCP communication on the Discovery Agent
-
Open for Outbound TCP communication on ALL other agents involved in the same scan to the Discovery Agent.
Note: This is for the Message Queue Management Interface and API.
-
Agent 13.2+
Ensure these ports are open:
-
Ports 5671 & 5672:
Use these settings:-
Open for Inbound TCP communication on the Discovery Agent
-
Open for Outbound TCP communication on ALL other agents involved in the same scan to the Discovery Agent.
Note: This communication is for reading and writing information to the message queue.
-
-
Ports 15671 & 15672:
Use these settings:-
Open for Inbound TCP communication on the Discovery Agent
-
Open for Outbound TCP communication on ALL other agents involved in the same scan to the Discovery Agent.
Note: This is for the Message Queue Management Interface and API.
Note: Distributed scans use the assigned discovery agent to conduct location discovery and provide a queue for all other agents to be assigned locations for scanning.
While the Discovery Agent can be manually chosen, it is recommended that you use the preferred Discovery Agent.
-
-
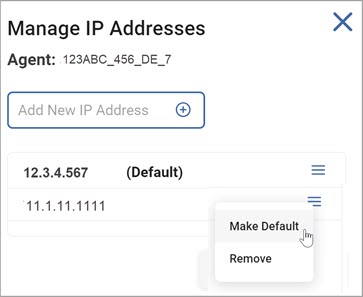
Configure Agent IPs: If your organization requires it, you can set a specific IP address.
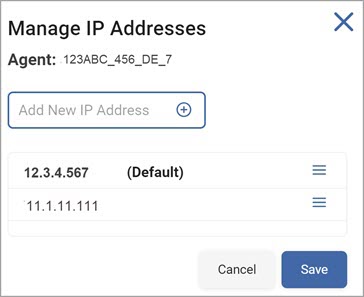
- In the Add New IP Address window, type the new IP address and click the plus (+) icon.
- Hover over the new IP address more options menu and click Make Default.
- Click Save to apply or Cancel to discard.
Agent 13.0 and legacy Agents, choose from these options:
These options are described and detailed in Scan Options.
-
Click Next to proceed, Previous to return to the previous screen, or Exit Without Saving
to discard. -
On the Select the scan schedule screen, choose when to run a scan.
-
For details on how to setup a schedule click on How to Set the Date and Time of a Scheduled Scan
-
Click Next to proceed, Previous to return to the previous screen, or Exit Without Saving
to discard. -
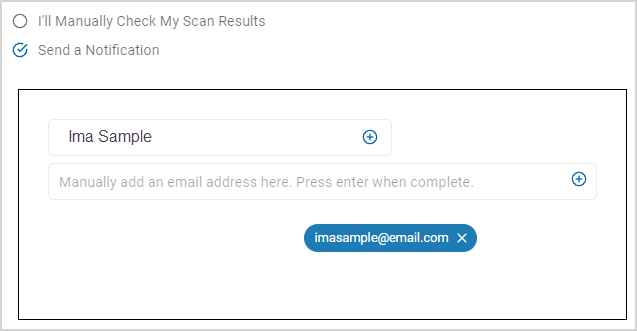
On the Who should receive notification of scan completion screen, select one:
-
I'll Manually Check My Scans Results
-
Send An Email Notification
-
-
Select a user from the drop-down list or type an email address in the entry field and click Enter.

-
To add additional email addresses, click the plus (+) icon and enter additional addresses.
-
Click Next to proceed, Previous to return to the previous screen, or Exit Without Saving
to discard. -
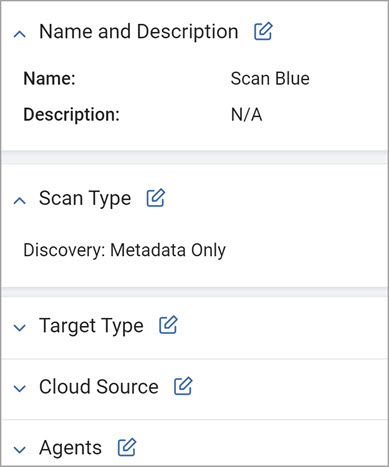
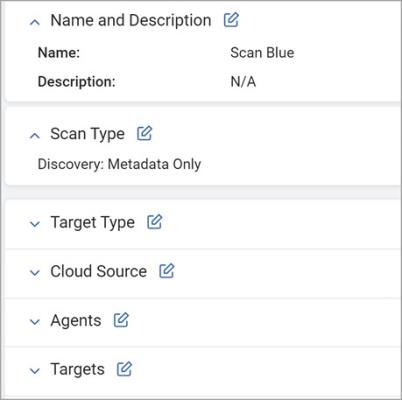
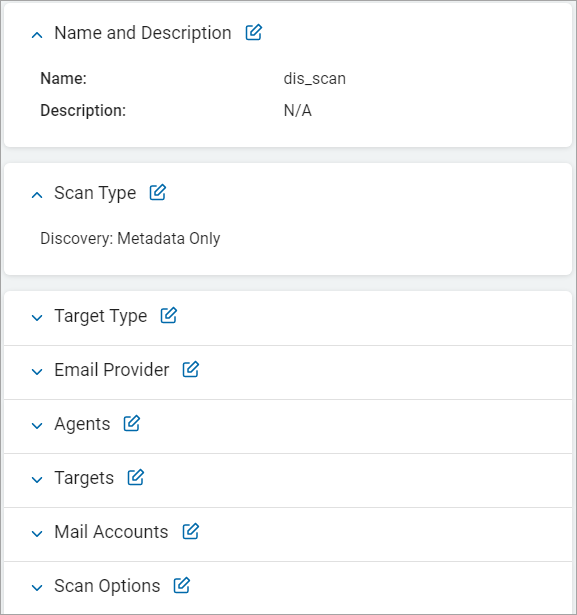
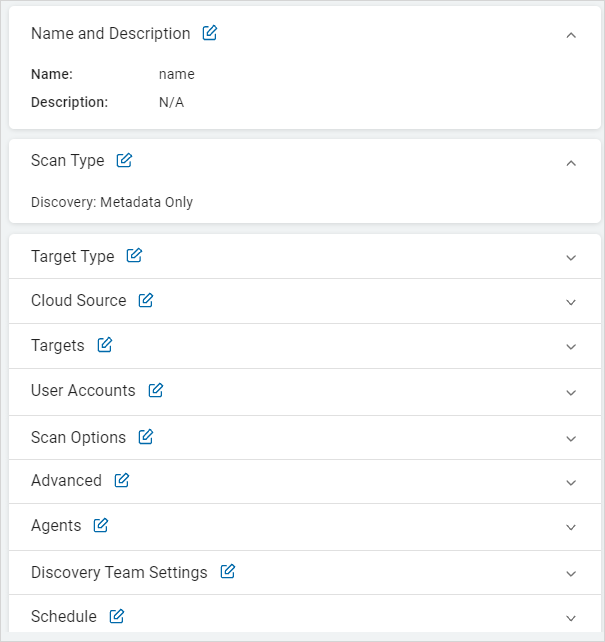
On the Summary screen, review your settings and content.
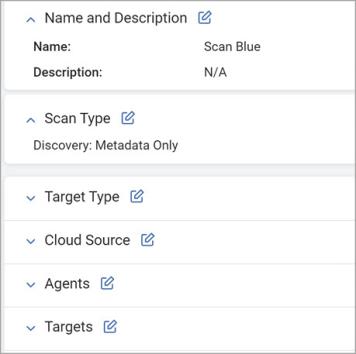
-
Use the edit
 icon links to jump to a specific screen.
-
Click Finish & Save to add the new Scan, Previous to return to the previous screen, or Exit Without Saving to discard.
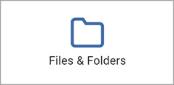
Create a Files & Folders Scan
Procedure:
-
Click the Files & Folder tile.
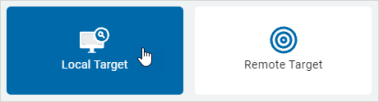
- Click a Target type, either Local or Remote.
- These examples use the Local Target. Expand a section for details:
Local Target
Procedure:
- On the Select the target(s) to scan screen, select target(s).
- Click the chevron (>) icon to expand a section.
- To add a Target, click the arrow next to the target name.
- To remove a Target, click the arrow next to the target name.
Note: Agent 13, Agent 13.1, and Legacy Agent Targets cannot be combined. If you select more than one version of the targets, you will get an error message and be prompted to reselect your Targets.
-
Click Next to proceed, Previous to return to the previous screen, or Exit Without Saving
to discard. -
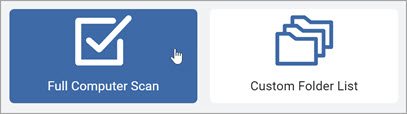
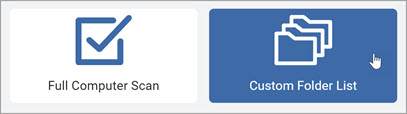
On the Set the search location type screen, select one:
-
Full Computer Scan
-
Logged in User's Directory
-
Cloud Storage Folders
-
All Removable Drives
-
Custom Folder List
-
Create a new Full Computer Scan, Logged in User's Directory scan, or All Removable Drivers scan

This example uses the Full Computer Scan.
-
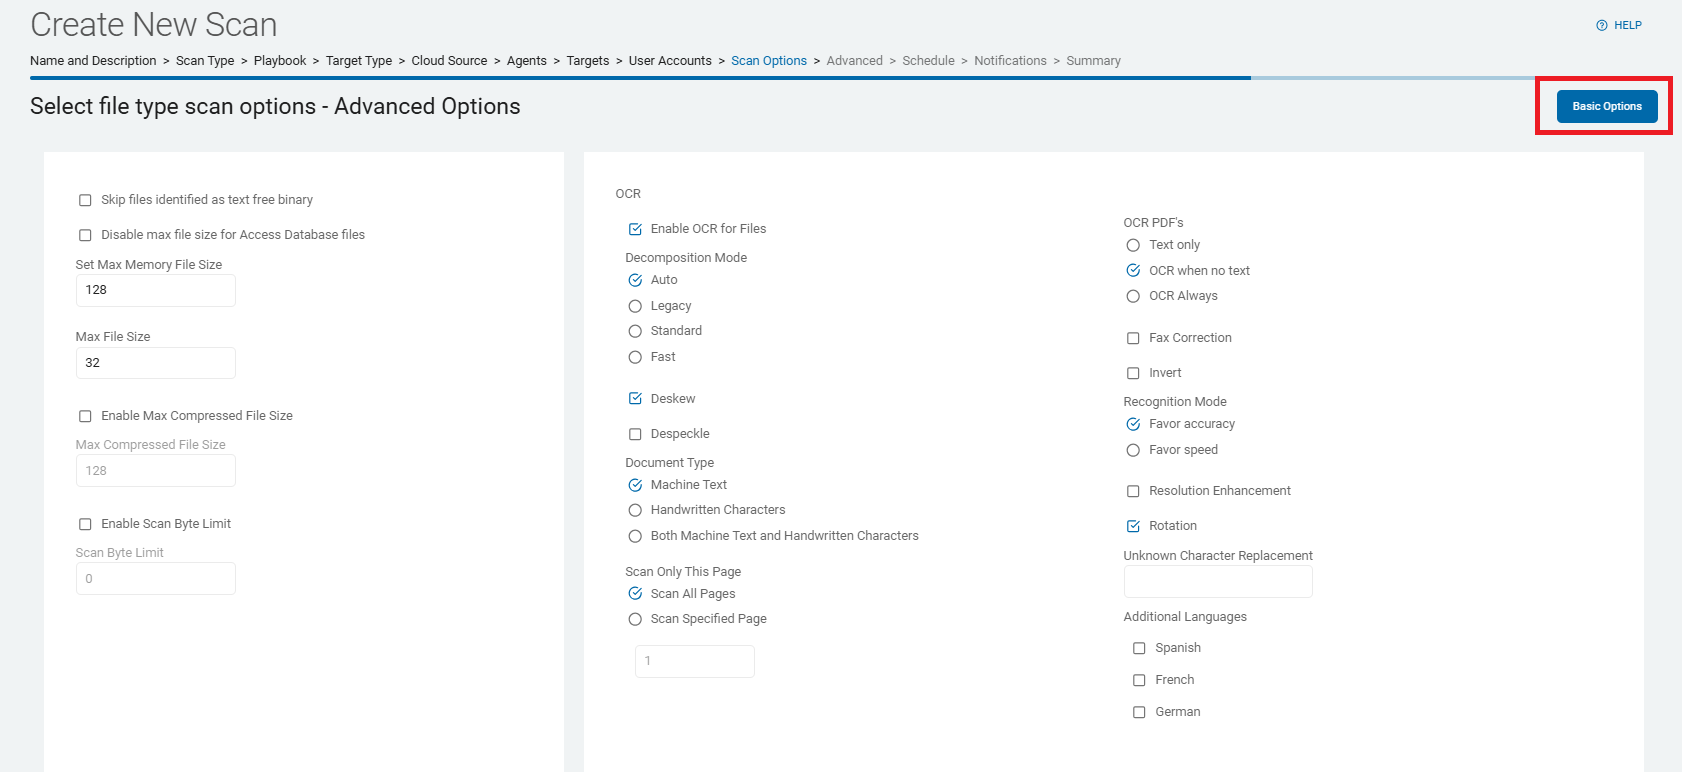
On the Select file type scan options screen, select from the available options.
These options are described and detailed in Scan Options.
If applicable, click Advanced Options button to add additional options or click Basic Options button to return to the original screen.
These options are also described and detailed in Scan Options.
-
Click Next to proceed, Previous to return to the previous screen, or Exit Without Saving
to discard. -
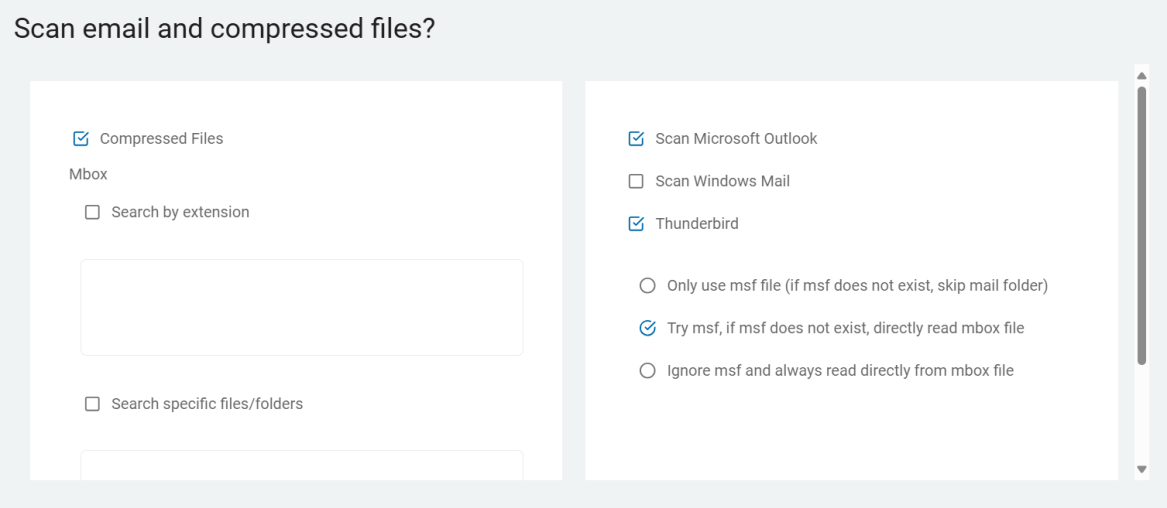
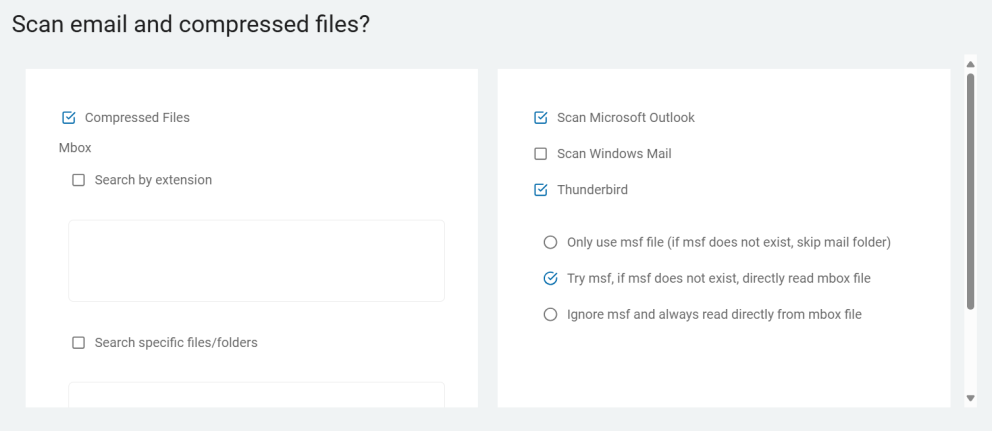
On the Scan email and compressed files? screen, setup the email scan. These options are detailed in Scan Options.
-
Click Next to proceed, Previous to return to the previous screen, or Exit Without Saving
to discard. -
On the Select Exchange / Outlook options screen, select from the available options.
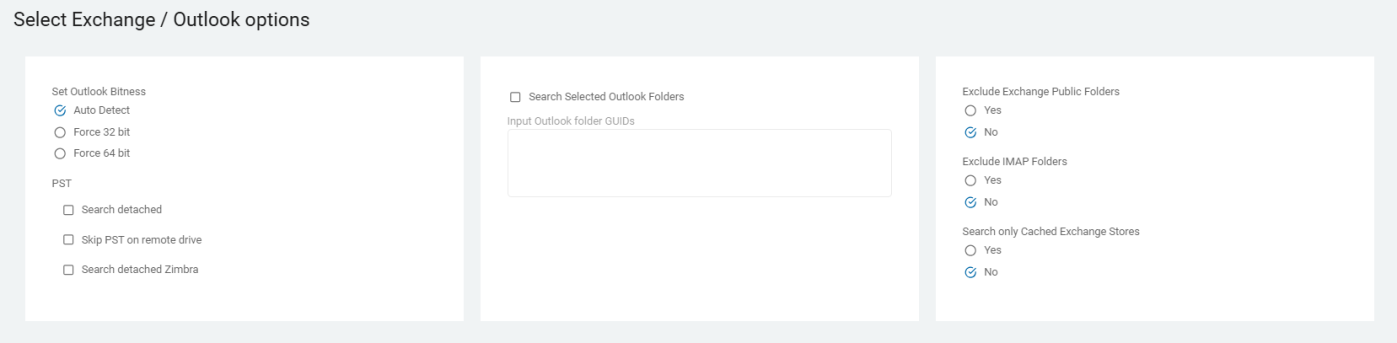
These options are detailed in Scan Options.
-
Click Next to proceed, Previous to return to the previous screen, or Exit Without Saving
to discard. -
On the Select advanced options screen, select from additional options.

These options are described and detailed in Scan Options.
Send Only Last Four Characters option only display if Sensitive Data Finder feature is disabled.
-
Click Next to proceed, Previous to return to the previous screen, or Exit Without Saving
to discard. -
To create a scan schedule click on How to Set the Date and Time of a Scheduled Scan.
-
Click Next to proceed, Previous to return to the previous screen, or Exit Without Saving
to discard. -
On the Who should receive notification of scan completion screen, select one:
-
I'll Manually Check My Scans Results
-
Send An Email Notification: Select a user from the drop-down list.
-
-
Type an email address in the entry field and click Enter.
-
To add additional email addresses, click the plus (+) icon.

-
Click Next to proceed, Previous to return to the previous screen, or Exit Without Saving
to discard. -
On the Summary screen, review your settings and content.

-
Use a edit
icon links to jump to a specific screen. 
-
Click Finish & Save to add the new Scan, Previous to return to the previous screen, or Exit Without Saving to discard.
Custom Folder List

Procedure:
-
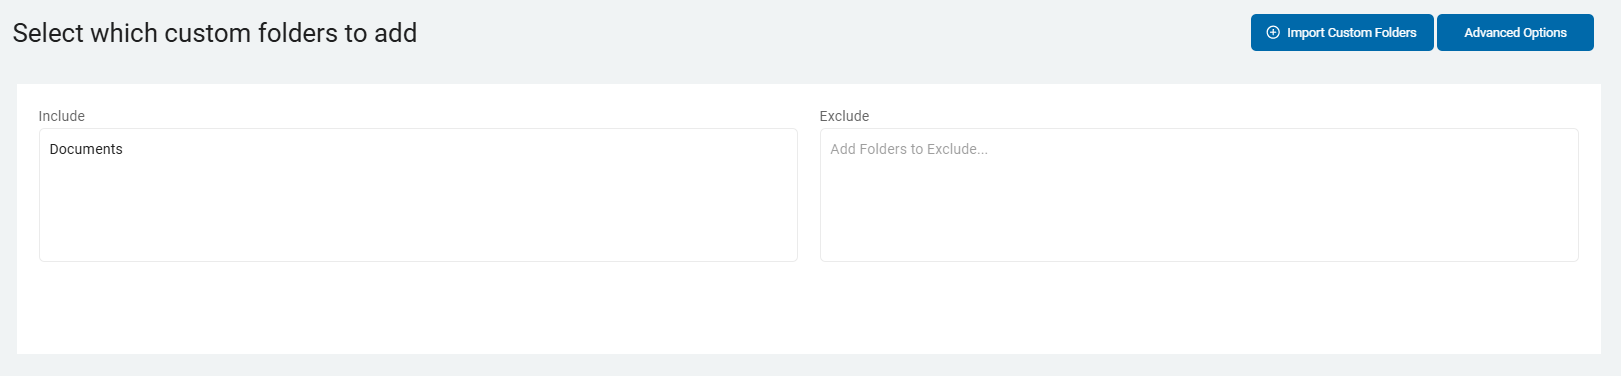
On the Select which customer folders to add screen, you must include or exclude at least one folder.
-
Include: Type the folder(s) to include, one per line.
-
Exclude: Type the folder(s) to exclude, one per line
-
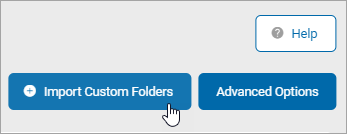
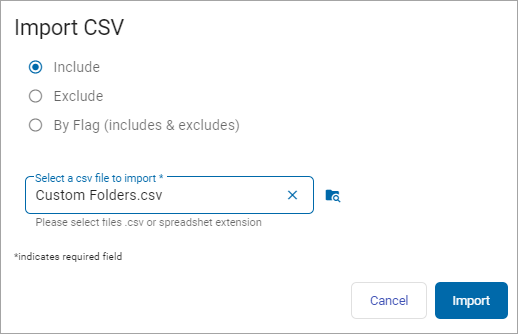
Import Custom Folders: Upload a .csv file of custom folder types.
-
-
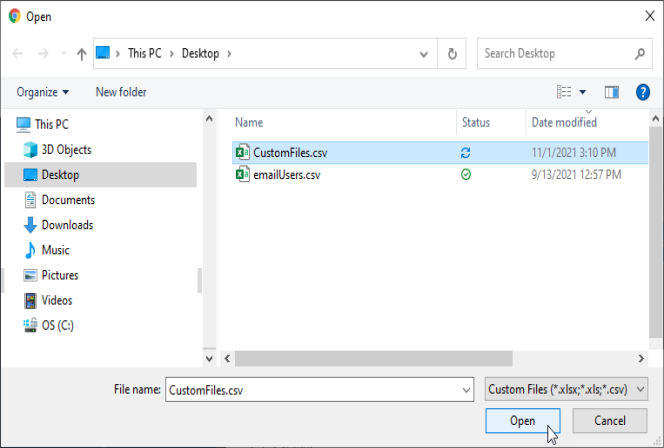
Click Import Custom Folders.
-
Locate the .csv folder on your local computer.
-
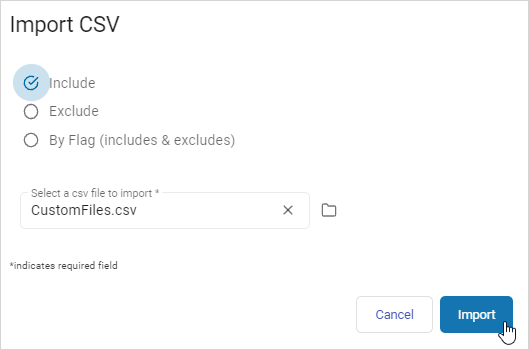
On the Import CSV pop-up window, select one:
-
Include
-
Exclude
-
By Flag (includes & excludes)
-
-
Click Import to import the file or Cancel to discard.
-
Click Finish & Save to add the new Scan, Previous to return to the previous screen, or Exit Without Saving to discard.
-
On the Select file type scan options screen, choose from the Basic Options.
-
These options are detailed in Scan Options.
-
Or click the Advanced Options button at the top of the screen for additional options.
-
Click the button again to return to the previous screen.
-
These options are also detailed in Scan Options.
-
Click Next to proceed, Previous to return to the previous screen, or Exit Without Saving
to discard. -
On the Scan email and compressed files? screen are email options.

-
These options are described in Scan Options.
-
Click Next to proceed, Previous to return to the previous screen, or Exit Without Saving
to discard. -
On the Select Exchange / Outlook options screen, select the related options.

-
These options are described in Scan Options.
-
Click Next to proceed, Previous to return to the previous screen, or Exit Without Saving
to discard. -
On the Select advanced options screen additional options are available.
These options are described and detailed in Scan Options.
Note: Send Only Last Four Characters option only display if Sensitive Data Finder feature is disabled.
-
Click Next to proceed, Previous to return to the previous screen, or Exit Without Saving
to discard. -
To select a scan schedule, see How to Set the Date and Time of a Scheduled Scan.
-
Click Next to proceed, Previous to return to the previous screen, or Exit Without Saving
to discard. -
On the Who should receive notification of scan completion screen, select one:
-
I'll Manually Check My Scans Results
-
Send An Email Notification: Select a user from the drop-down list.
-
-
Type an email address in the text box and click Enter.
-
To add additional email addresses, click the plus (+) icon.
-
Click Next to proceed, Previous to return to the previous screen, or Exit Without Saving
to discard. -
On the Summary screen, review your settings and content.
-
Use a edit
icon link to jump to a specific screen.
-
Click Finish & Save to add the new Scan, Previous to return to the previous screen, or Exit Without Saving to discard.
Cloud Storage Folders
Procedure:
-
On the Select a cloud storage folder to scan screen, select a storage type to scan:
-
Dropbox
-
Google Drive
-
Box
-
OneDrive for Business
-
Amazon S3

-
-
On the Select file type scan options screen, choose from the options.
These options are detailed in Scan Options.
-
Click the Advanced Options button in the top right portion of the screen to add additional options or click the Basic Options button to return.
These options are also described and detailed in Scan Options.
-
Click Next to proceed, Previous to return to the previous screen, or Exit Without Saving
to discard. -
The next screen is the Scan email and compressed files? screen.
-
Click Next to proceed, Previous to return to the previous screen, or Exit Without Saving
to discard. -
The next screen is the Select Exchange / Outlook options screen.

-
Click Next to proceed, Previous to return to the previous screen, or Exit Without Saving
to discard. -
On the Select advanced options screen are additional advanced options.
These options are detailed in Scan Options.
Send Only Last Four Characters option only display if Sensitive Data Finder feature is disabled.
-
Click Next to proceed, Previous to return to the previous screen, or Exit Without Saving
to discard. -
To select the scan schedule, see How to Set the Date and Time of a Scheduled Scan.
-
Click Next to proceed, Previous to return to the previous screen, or Exit Without Saving
to discard. -
On the Who should receive notification of scan completion screen, select one:
-
I'll Manually Check My Scans Results
-
Send An Email Notification
-
-
Type an email address in the text box and click Enter.
-
To add additional email addresses, click the plus (+) icon.
-
Click Next to proceed, Previous to return to the previous screen, or Exit Without Saving
to discard. -
On the Summary screen, review your settings and content.
-
Use a edit
icon link to jump to a specific screen. 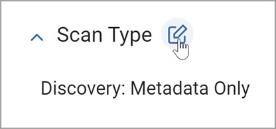
-
Click Finish & Save to add the new Scan, Previous to return to the previous screen, or Exit Without Saving to discard.
Remote Target
Procedure:
- On the Select the target type screen, select Remote.
- On the Select the agent(s) to perform the scan screen, choose the agents you want to use.
- To expand a section, click the chevron (>) icon.
- To add an Agent to the Selected section, click the arrow next to the agent name.
Note: Agent 13, Agent 13.1, Agent 13.2, and Legacy Agents cannot be combined.
If you select more than one version of the agents, you will get an error message and be prompted to reselect your agents.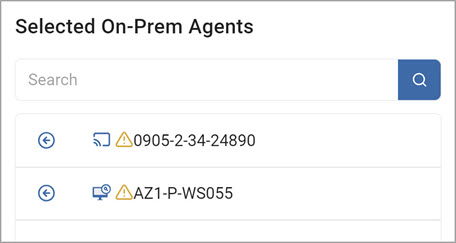
- To remove an agent, click the arrow next to the agent name.
-
Click Next to proceed, Previous to return to the previous screen, or Exit Without Saving
to discard.
On the Select the targets(s) to scan screen:
- To expand a section, click the chevron (>) icon.
- Select one or more targets to scan.
- To add a target, click the arrow next to the target name.
- To remove a target from the Selected Targets section, click the arrow next to the target name.
-
Click Next to proceed, Previous to return to the previous screen, or Exit Without Saving
to discard. -
On the Select the search location type screen, choose one.
Full Computer Scan
Procedure:
- On the Select file type scan options screen, choose from the options. These options are detailed in Scan Options.
- Click Advanced Options button at the top of the screen to add additional options or click Basic Options button to return.

These options are also detailed in Scan Options.
-
Click Next to proceed, Previous to return to the previous screen, or Exit Without Saving
to discard. - On the Select advanced options screen, choose from the additional advance options.
These options are detailed in Scan Options.
Note: Send Only Last Four Characters option only display if Sensitive Data Finder feature is disabled.
-
Click Next to proceed, Previous to return to the previous screen, or Exit Without Saving
to discard. -
To setup the scan schedule see, How to Set the Date and Time of a Scheduled Scan.
-
Click Next to proceed, Previous to return to the previous screen, or Exit Without Saving
to discard. -
On the Who should receive notification of scan completion screen, select one:
-
I'll Manually Check My Scans Results
-
Send An Email Notification
-
-
Type an email address in the text box and click Enter or choose from the drop-down list.
-
To add additional email addresses, click the plus (+) icon.
-
Click Next to proceed, Previous to return to the previous screen, or Exit Without Saving
to discard. -
On the Summary screen, review your settings and content.
-
Use a edit
icon link to jump to a specific screen.
-
Click Finish & Save to add the new Scan, Previous to return to the previous screen, or Exit Without Saving to discard.
Custom Folder List
Procedure:
-
On the Add Custom Folders screen, you must include or exclude at least one folder.
-
To include files, type the name(s) of the folders, one title per line, in the Include box.
-
To exclude files, type the name(s) of the folders, one title per line, in the Exclude box.
-
-
To import a custom folder list .csv file:
-
Click Import Customer Folders.
-
The Import CSV pop-up window appears.
-
Select one:
-
• Include
-
• Exclude
-
• By Flag (includes & excludes)
-
-
Click the Select a csv file to import* box.
-
Locate the file on your computer.
-
Click Import to import the file or Cancel to discard.
-
Click the Advanced Options button at the top of this screen or click the Basic Options button to return to the previous screen.
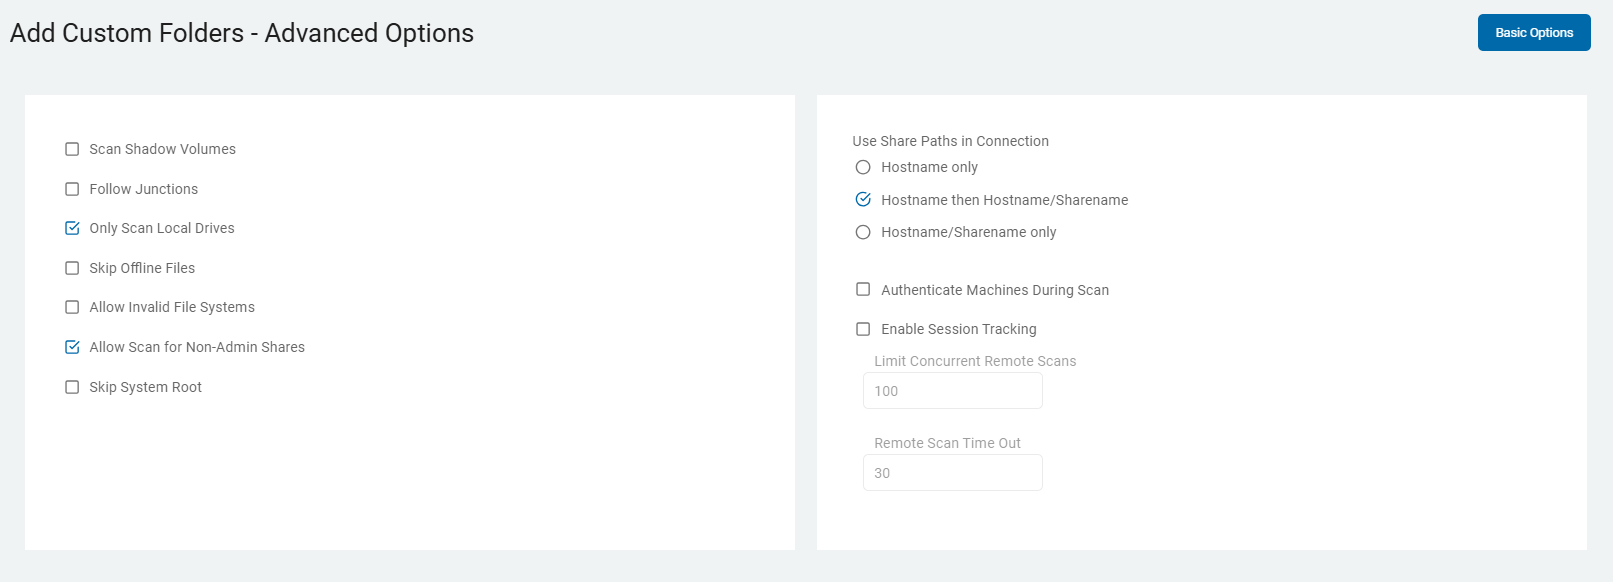
These options are detailed in Scan Options.
-
Click Next to proceed, Previous to return to the previous screen, or Exit Without Saving
to discard. -
On the Select file type scan options screen, choose from the Basic Options.
-
You can click the Advanced Options button from this screen for additional advanced selections. These options are also detailed in Scan Options.
-
Click Next to proceed, Previous to return to the previous screen, or Exit Without Saving
to discard. -
On the Select advanced options screen additional options are available.

These options are detailed in Scan Options.
Send Match and Send Only Last Four Characters options only display if Sensitive Data Finder feature is disabled.
-
Click Next to proceed, Previous to return to the previous screen, or Exit Without Saving
to discard. -
On the Discovery Team Settings screen, choose which settings to use.
Note: The screen only displays when On-Prem agent is selected.
Agent 13.0+
Ensure these ports are open:
-
Port 5672:
Use these settings:-
Open for Inbound TCP communication on the Discovery Agent
-
Open for Outbound TCP communication on ALL other agents involved in the same scan to the Discovery Agent.
Note: This communication is for reading and writing information to the message queue.
-
-
Port 15672:
Use these settings:-
Open for Inbound TCP communication on the Discovery Agent
-
Open for Outbound TCP communication on ALL other agents involved in the same scan to the Discovery Agent.
Note: This is for the Message Queue Management Interface and API.
-
Agent 13.2+
Ensure these ports are open:
-
Ports 5671 & 5672:
Use these settings:-
Open for Inbound TCP communication on the Discovery Agent
-
Open for Outbound TCP communication on ALL other agents involved in the same scan to the Discovery Agent.
Note: This communication is for reading and writing information to the message queue.
-
-
Ports 15671 & 15672:
Use these settings:-
Open for Inbound TCP communication on the Discovery Agent
-
Open for Outbound TCP communication on ALL other agents involved in the same scan to the Discovery Agent.
Note: This is for the Message Queue Management Interface and API.
-
-
Discovery Agent: Select an agent from the drop-down list.
Note: Distributed scans use the assigned discovery agent to conduct location discovery and provide a queue for all other agents to be assigned locations for scanning. While the Discovery Agent can be manually chosen, it is recommended that you use the preferred Discovery Agent.
-
Configure Agent IPs: If your organization requires it, you can set a specific IP address.
-
In the Add New IP Address window, type the new IP address and click the plus icon.
-
Hover over the new IP address more options menu and click Make Default.
-
Click Save to apply or Cancel to discard.
Agents 13.0 and legacy Agents, select from these options.
These options are detailed in Scan Options.
-
Click Next to proceed, Previous to return to the previous screen, or Exit Without Saving
to discard. -
To set up a schedule for your scan, see How to Set the Date and Time of a Scheduled Scan.
-
Click Next to proceed, Previous to return to the previous screen, or Exit Without Saving
to discard. -
On the Select who should receive notification of scan completion screen, enter the information or select from the drop-down window.
-
I'll Manually Check My Scans Results
-
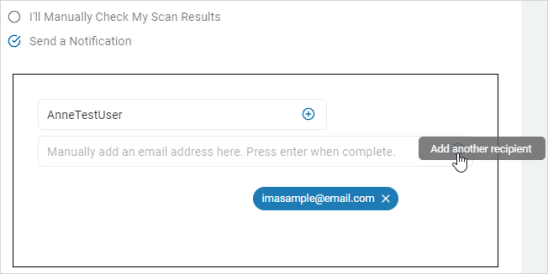
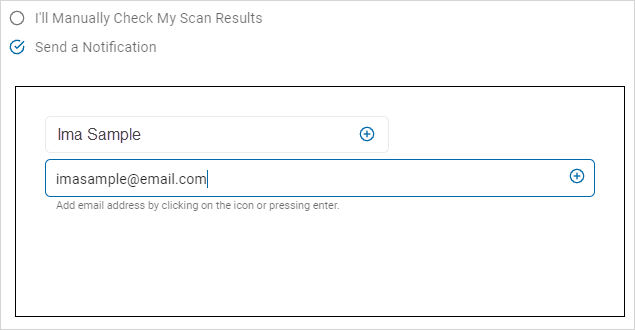
Send a Notification:
-
Type an email address in the text box and click the plus (+) icon and Enter.
-
Click the plus icon to add additional email addresses.
-
Click the x to remove an email address.
-
-
Click Next to proceed, Previous to return to the previous screen, or Exit Without Saving
to discard. -
On the Summary screen, review your settings and content.
-
Use a edit
icon link to jump to a specific screen.
-
Click Finish & Save to add the new Scan, Previous to return to the previous screen, or Exit Without Saving to discard.
Create an Email Scan
Procedure:
-
Click the Email tile.

-
Select an email service provider:
Exchange
Procedure:
-
On the Select agent(s) to perform the scan screen, select one or more On Prem Agents:
-
Click the chevron (>) icon to expand any section.
-
To add an Agent, click the arrow next to the agent name.
-
To remove an Agent, click the arrow next to the agent name.
-
Click Finish & Save to add the new Scan, Previous to return to the previous screen, or Exit Without Saving to discard.
-
On the Select the target(s) to scan screen:
-
Click the chevron (>) icon to expand any section.
-
To add a Target, click the arrow next to the target name.
-
To remove a Target, click the arrow next to the target name.

-
Click Next to proceed, Previous to return to the previous screen, or Exit Without Saving
to discard. -
On the Scan servers by account list screen, select all applicable:
-
Click Next to proceed, Previous to return to the previous screen, or Exit Without Saving
to discard. -
On the Select file type scan options screen, choose from these options:
-
If applicable, click Advanced Options button at the top of the screen or click the Basic Options button to return.
These options are detailed in Scan Options.
-
Click Next to proceed, Previous to return to the previous screen, or Exit Without Saving
to discard. -
On the Select Exchange / Outlook options screen, select from these options:
These options are detailed in Scan Options.
-
Click Next to proceed, Previous to return to the previous screen, or Exit Without Saving
to discard. -
On the Select advanced options screen, choose from the additional options:
These options are detailed in Scan Options.
-
Click Next to proceed, Previous to return to the previous screen, or Exit Without Saving
to discard. -
On the Discovery Team Settings screen, enter the necessary information.
The screen only displays when multiple On-Prem Agents are selected.
Agent 13.0+
Ensure these ports are open:
-
Port 5672:
Use these settings:-
Open for Inbound TCP communication on the Discovery Agent
-
Open for Outbound TCP communication on ALL other agents involved in the same scan to the Discovery Agent.
Note: This communication is for reading and writing information to the message queue.
-
-
Port 15672:
Use these settings:-
Open for Inbound TCP communication on the Discovery Agent
-
Open for Outbound TCP communication on ALL other agents involved in the same scan to the Discovery Agent.
Note: This is for the Message Queue Management Interface and API.
-
Agent 13.2+
Ensure these ports are open:
-
Ports 5671 & 5672:
Use the following settings:-
Open for Inbound TCP communication on the Discovery Agent
-
Open for Outbound TCP communication on ALL other agents involved in the same scan to the Discovery Agent.
Note: This communication is for reading and writing information to the message queue.
-
-
Ports 15671 & 15672:
Use these settings:-
Open for Inbound TCP communication on the Discovery Agent
-
Open for Outbound TCP communication on ALL other agents involved in the same scan to the Discovery Agent.
Note: This is for the Message Queue Management Interface and API.
-
-
Discovery Agent: Select an agent from the drop-down list.
Note: Distributed scans use the assigned discovery agent to conduct location discovery and provide a queue for all other agents to be assigned locations for scanning. While the Discovery Agent can be manually chosen, it is recommended that you use the preferred Discovery Agent.
-
Configure Agent IPs: If your organization requires it, you can set a specific IP address.
-
In the Add New IP Address box, type the new IP address and click the plus icon.
-
Hover over the new IP address more options menu and click Make Default.
-
Click Save to apply or Cancel to discard.
Agent 13.0 and legacy Agents, choose from these options:
-
Click Next to proceed, Previous to return to the previous screen, or Exit Without Saving
to discard. -
To set up a scan schedule see, How to Set the Date and Time of a Scheduled Scan.
-
Click Next to proceed, Previous to return to the previous screen, or Exit Without Saving
to discard. -
On the Who should receive notification of scan completion screen, select one:
-
I'll Manually Check My Scans Results
-
Send a Notification:
-
-
Type an email address in the text box and click the plus (+) icon or Enter.
-
Click the plus (+) icon to add additional email addresses.
-
Click the x to remove an email address.
-
Click Next to proceed, Previous to return to the previous screen, or Exit Without Saving
to discard. -
On the Summary screen, review your settings and content.
-
Use a edit
icon link to jump to a specific screen.
-
Click Finish & Save to add the new Scan, Previous to return to the previous screen, or Exit Without Saving to discard.
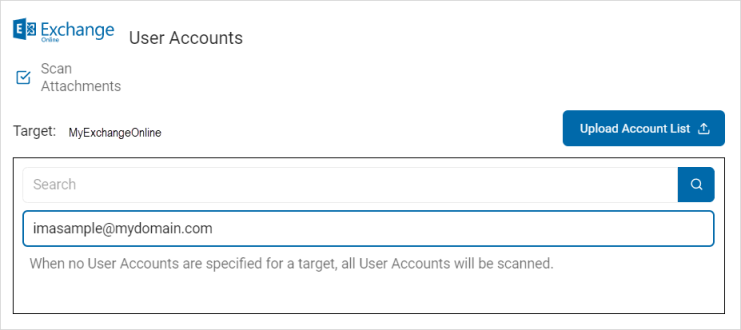
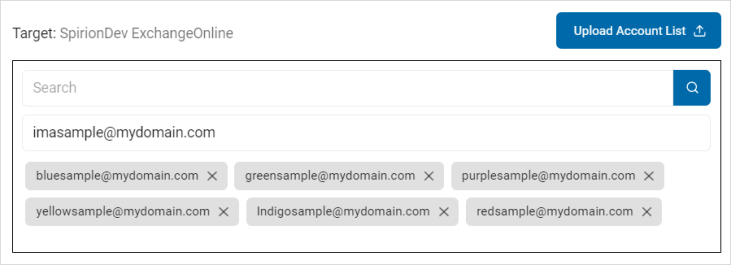
Exchange Online
Procedure:
-
On the Select the agent(s) to perform the scan screen, select the On-Prem Agents you want to use.
-
Click the chevron (>) icon to expand any section.
-
To add an Agent to the Selected section, click the arrow next to the agent name.
-
To remove an On-Prem agent, click the arrow next to the agent name.
-
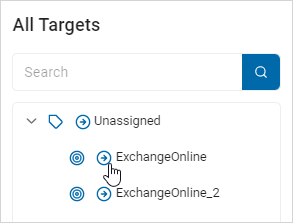
On the Select the target(s) to scan screen:
-
Click the chevron (>) icon to expand any section.
-
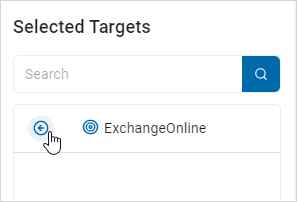
To add Target(s), click the arrow next to the target name.
-
-
To remove a Target, click the arrow next to the target name.
-
Click Next to proceed, Previous to return to the previous screen, or Exit Without Saving
to discard. -
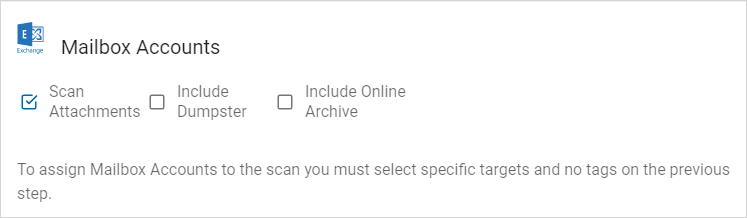
On the Select accounts to scan screen, select Scan Attachments, if applicable.
-
This is how to add user accounts:
-
Type the user account name in the box and click Enter on your keyboard to search for the user account name.
-
-
To upload multiple accounts:
-
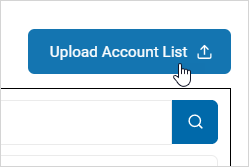
Click Upload Account List.
-
-
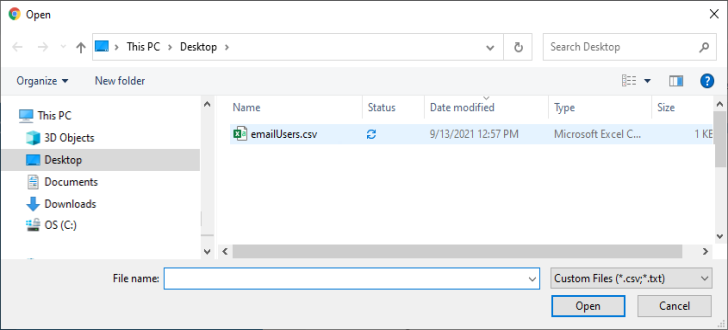
Locate and select the .csv file with the accounts on your computer.
-
The user accounts are displayed in the Target area.
-
-
Click Next to proceed, Previous to return to the previous screen, or Exit Without Saving
to discard. -
On the Select file type scan options screen, click the option type button:
-
Advanced Options
-
Basic Options (default)
-
Basic Options:
Advanced Options:
These options are detailed in Scan Options.
- Click Next to proceed, Previous to return to the previous screen, or Exit Without Saving
to discard. - On the Discovery Team Settings screen, select from these options:
The screen only displays when multiple On-Prem Agents are selected.
Agent 13.0+
Ensure these ports are open:
-
Port 5672:
Use these settings:-
Open for Inbound TCP communication on the Discovery Agent
-
Open for Outbound TCP communication on ALL other agents involved in the same scan to the Discovery Agent.
Note: This communication is for reading and writing information to the message queue.
-
-
Port 15672:
Use these settings:-
Open for Inbound TCP communication on the Discovery Agent
-
Open for Outbound TCP communication on ALL other agents involved in the same scan to the Discovery Agent.
Note: This is for the Message Queue Management Interface and API.
-
Agent 13.2+
Ensure these ports are open:
-
Ports 5671 & 5672:
Use these settings:-
Open for Inbound TCP communication on the Discovery Agent
-
Open for Outbound TCP communication on ALL other agents involved in the same scan to the Discovery Agent.
Note: This communication is for reading and writing information to the message queue.
-
-
Ports 15671 & 15672:
Use these settings:-
Open for Inbound TCP communication on the Discovery Agent
-
Open for Outbound TCP communication on ALL other agents involved in the same scan to the Discovery Agent.
Note: This is for the Message Queue Management Interface and API.
-
-
Discovery Agent: Select an agent from the drop-down list.
Note: Distributed scans use the assigned discovery agent to conduct location discovery and provide a queue for all other agents to be assigned locations for scanning.
While the Discovery Agent can be manually chosen, it is recommended that you use the preferred Discovery Agent.
-
Configure Agent IPs: If your organization requires it, you can set a specific IP address.
- In the Add New IP Address window, type the new IP address and click the plus icon.
- Hover over the new IP address more options menu and click Make Default.
- Click Save to apply or Cancel to discard.
For Agent 13.0 or legacy Agents, select from these settings:
These options are detailed in Scan Options.
- Click Next to proceed, Previous to return to the previous screen, or Exit Without Saving
to discard. - To setup a scan schedule, see How to Set the Date and Time of a Scheduled Scan.
- Click Next to proceed, Previous to return to the previous screen, or Exit Without Saving
to discard. - On the Who should receive notification of scan completion screen, select one:
- I'll Manually Check My Scans Results
- Send An Email Notification
- Select a user from the drop-down list or type an email address in the text box and click Enter.
- To add additional email addresses, click the plus (+) icon.
- Click Next to proceed, Previous to return to the previous screen, or Exit Without Saving
to discard. - On the Summary screen, review your settings and content:
- Use a edit icon link to jump to a specific screen.

- Click Finish & Save to add the new Scan, Previous to return to the previous screen, or Exit Without Saving to discard.
Gmail
On the Select the agent(s) to perform the scan screen, choose the Agents you want to use.
- Click the chevron (>) icon to expand any section.
- To add an Agent to the Selected section, click the arrow next to the agent name.
- To remove an On-Prem Agent, click the arrow next to the agent name.
- Click Next to proceed, Previous to return to the previous screen, or Exit Without Saving
to discard. - On the Select the target(s) to scan screen, use the chevron (>) icon to expand any section.
- To add Target(s), click the arrow next to the target name.
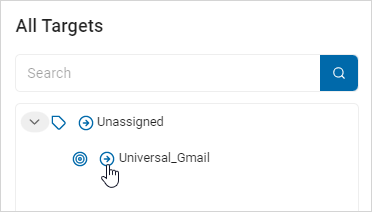
- To remove a Target, click the arrow next to the target name.
- Click Next to proceed, Previous to return to the previous screen, or Exit Without Saving
to discard. - On the Select accounts to scan screen, check the Scan Attachments checkbox, if applicable.
- Add user accounts by either:
- Typing the user account name in the entry field and click Enter or,
- Searching for the user account name.
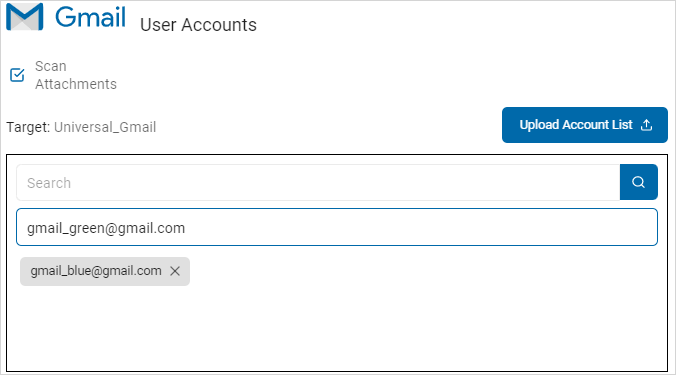
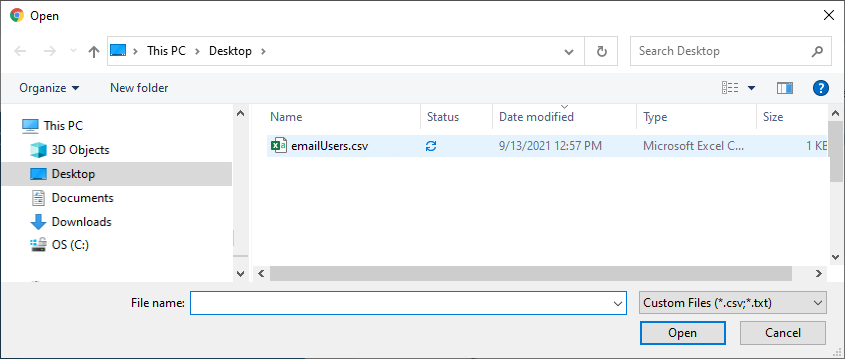
- To upload multiple accounts, click the Upload Account List button.
- Locate and select the .csv file with the accounts on your computer.
-
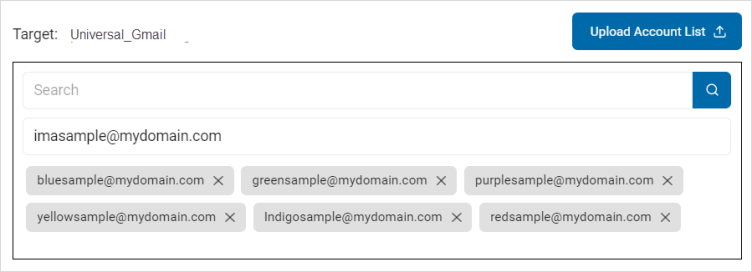
The user accounts are displayed in the Target area.
- Click Next to proceed, Previous to return to the previous screen, or Exit Without Saving
to discard. - Select from the Basic Options on the Select file type scan options screen.
- If applicable, click the Advanced Options button to add additional options or click the Basic Options button again to return.
Both the Basic and Advanced options are described in Scan Options.
- Click Next to proceed, Previous to return to the previous screen, or Exit Without Saving
to discard. - On the Select advanced options screen select from these additional options:

These are described in Scan Options.
- Click Next to proceed, Previous to return to the previous screen, or Exit Without Saving
to discard. - On the Discovery Team Settings screen, setup your Discovery Team.
The screen only displays when multiple On-Prem agents are selected.
Agent 13.0+
Ensure these ports are open:
-
Port 5672
Use these settings:-
Open for Inbound TCP communication on the Discovery Agent
-
Open for Outbound TCP communication on ALL other agents involved in the same scan to the Discovery Agent.
Note: This communication is for reading and writing information to the message queue.
-
-
Port 15672
Use these settings:-
Open for Inbound TCP communication on the Discovery Agent
-
Open for Outbound TCP communication on ALL other agents involved in the same scan to the Discovery Agent.
Note: This is for the Message Queue Management Interface and API.
-
Agent 13.2+
Ensure these ports are open:
-
Ports 5671 & 5672
Use these settings:-
Open for Inbound TCP communication on the Discovery Agent
-
Open for Outbound TCP communication on ALL other agents involved in the same scan to the Discovery Agent.
Note: This communication is for reading and writing information to the message queue.
-
-
Ports 15671 & 15672
Use these settings:-
Open for Inbound TCP communication on the Discovery Agent
-
Open for Outbound TCP communication on ALL other agents involved in the same scan to the Discovery Agent.
Note: This is for the Message Queue Management Interface and API.
-
-
Discovery Agent: Select an agent from the drop-down list.
Note: Distributed scans use the assigned discovery agent to conduct location discovery and provide a queue for all other agents to be assigned locations for scanning.
Discovery Agent can be manually chosen, but Spirion recommends you use the preferred Discovery Agent.
-
Configure Agent IPs: If your organization requires it, you can set a specific IP address.
- In the Add New IP Address window, type the new IP address and click the plus icon.
- Hover over the new IP address more options menu and click Make Default.
- Click Save to apply or Cancel to discard.
-
Agent 13.0 and legacy Agents, choose from these options:
These options are detailed in Scan Options.
- Click Next to proceed, Previous to return to the previous screen, or Exit Without Saving
to discard. - To setup a schedule for a scan see, How to Set the Date and Time of a Scheduled Scan.
- Click Next to proceed, Previous to return to the previous screen, or Exit Without Saving
to discard. - On the Who should receive notification of scan completion screen, select one:
- I'll Manually Check My Scans Results
- Send An Email Notification
-
Select a user from the drop-down list or type an email address in the entry field and click Enter.
-
To add additional email addresses, click the plus (+) icon.
- Click Next to proceed, Previous to return to the previous screen, or Exit Without Saving
to discard. - On the Summary screen, review your settings and content:

- Use a edit icon link to jump to a specific screen.

- Click Finish & Save to add the new Scan, Previous to return to the previous screen, or Exit Without Saving to discard.
Create a Collaboration Tools Scan
Procedure:
- Click the Collaboration Tools tile.
- Click Next to proceed, Previous to return to the previous screen, or Exit Without Saving
to discard. - On the Select the collaboration tool to scan screen, select one:
- SharePoint Online
- Bitbucket

- Expand these sections for more information.
SharePoint Online
Procedure:
- On the Select the agent(s) to perform the scan, use the chevron (>) icon to expand any section.
- To add an agent to the Selected section, click the arrow next to the agent name.
- To remove an On-Prem agent, click the arrow next to the agent name.
- Click Next to proceed, Previous to return to the previous screen, or Exit Without Saving
to discard. - On the Select the target(s) to scan screen, use the chevron (>) icon to expand any section.
- To add a Target, click the arrow next to the target name.
- To remove a Target, click the arrow next to the agent name.
- Click Next to proceed, Previous to return to the previous screen, or Exit Without Saving
to discard. - On the Select SharePoint options screen, select from these options:
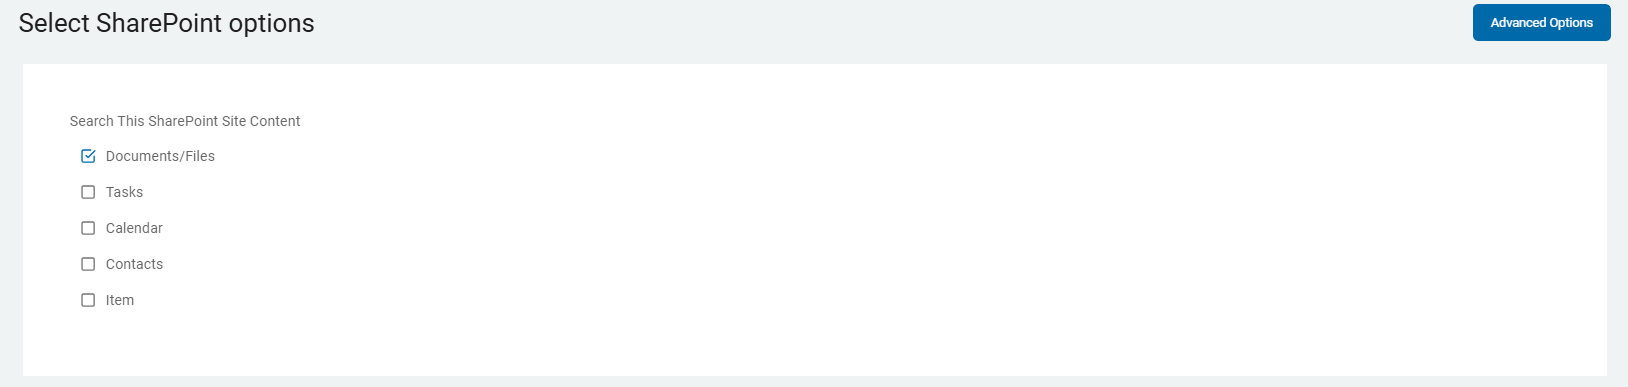
- If applicable, click Advanced Options button and add Advanced Options, or click the Basic Options button to return.
- On the Select advanced SharePoint options, choose which options apply.
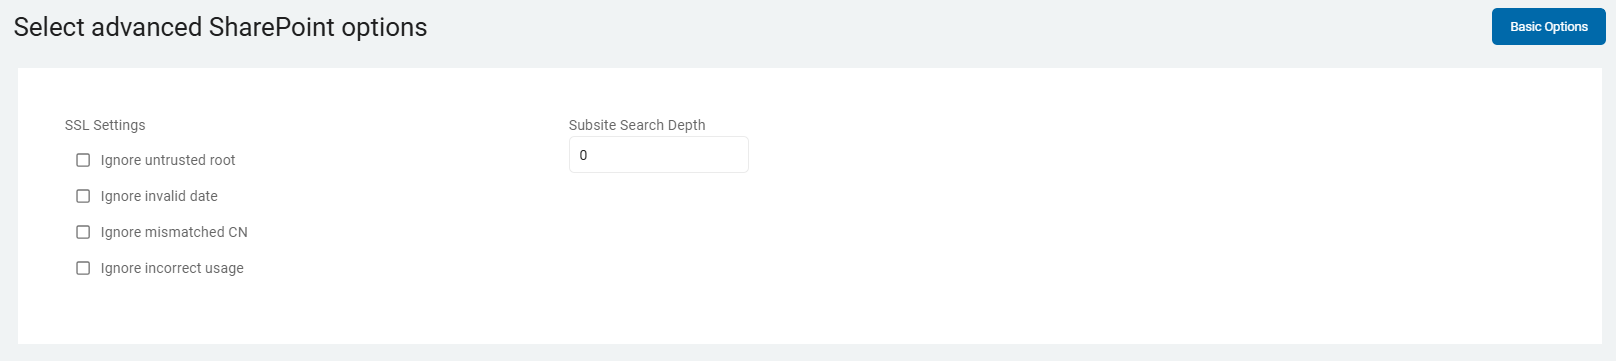
These options are detailed in Scan Options.
- Click Next to proceed, Previous to return to the previous screen, or Exit Without Saving
to discard. - On the Select file type scan options - Advanced Options, are additional Advanced Options to choose from.
This options are also detailed in Scan Options.
- Click Next to proceed, Previous to return to the previous screen, or Exit Without Saving
to discard. - On the Select Exchange / Outlook options choose from these options. They are detailed in Scan Options.
- Click Next to proceed, Previous to return to the previous screen, or Exit Without Saving
to discard. - The next screen, Select advanced options, provides additional advanced options that are detailed in Scan Options.

- Click Next to proceed, Previous to return to the previous screen, or Exit Without Saving
to discard. - On the Discovery Team Settings screen, set up your Discovery Team.
The screen only displays when multiple On-Prem agents are selected.
Agent 13.1 and above
- Ensure Port 5672 is open for inbound connections at the location of the Discovery Agent.
- Discovery Agent: Select an agent from the drop-down list.
Note: Distributed scans use the assigned discovery agent to conduct location discovery and provide a queue for all other agents to be assigned locations for scanning.
While the Discovery Agent can be manually chosen, it is recommended that you use the preferred Discovery Agent.
-
Configure Agent IPs: If your organization requires it, you can set a specific IP address.
- Click Configure Agent IP's. In the Add New IP Address window, type the new IP address and click the plus icon.
- Hover over the new IP address more options menu and click Make Default.
- Click Save to apply or Cancel to discard.
Agent 13.0 and legacy Agents, choose from these options:
These options are described in Scan Options.
- Click Next to proceed, Previous to return to the previous screen, or Exit Without Saving
to discard. - To set up a scan schedule see, How to Set the Date and Time of a Scheduled Scan.
- Click Next to proceed, Previous to return to the previous screen, or Exit Without Saving
to discard. - On the Who should receive notification of scan completion screen, select one:
- I'll Manually Check My Scans Results
- Send An Email Notification
- Select a user from the drop-down list or type an email address in the entry field and click Enter.
- To add additional email addresses, click the plus (+) icon to add the addresses.
- Click Next to proceed, Previous to return to the previous screen, or Exit Without Saving
to discard. - On the Summary screen, review your settings and content.
- Use a edit icon link to jump to a specific screen.

- Click Finish & Save to add the new Scan, Previous to return to the previous screen, or Exit Without Saving to discard.
Bitbucket
Procedure:
-
After selecting Bitbucket, the Select the agent(s) to perform the scan screen opens.
-
Click the chevron (>) icon to expand any section.
-
To add an agent to the Selected section, click the arrow next to the agent name.
-
To remove an On-Prem agent, click the arrow next to the agent name.
-
Click Next to proceed, Previous to return to the previous screen, or Exit Without Saving
to discard. -
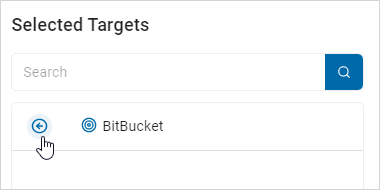
On the Select the target(s) to scan screen, click the chevron (>) icon to expand any section.
-
To add a Target, click the arrow next to the target name.
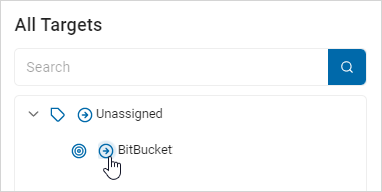
-
To remove a Target, click the arrow next to the target name.
-
Click Next to proceed, Previous to return to the previous screen, or Exit Without Saving
to discard. -
The Select file type scan options screen displays Basic Options.
-
If applicable, click the Advanced Options button at the top of the screen to add additional options or click the Basic Options button to return.
These options are detailed in Scan Options.
-
Click Next to proceed, Previous to return to the previous screen, or Exit Without Saving
to discard. -
On the Select Exchange / Outlook options screen select from these options. They are also described in Scan Options.
-
Click Next to proceed, Previous to return to the previous screen, or Exit Without Saving
to discard. -
The next screen is the Select advanced options screen. These options are detailed in Scan Options.

-
Click Next to proceed, Previous to return to the previous screen, or Exit Without Saving
to discard. -
On the Discovery Team Settings screen, set up the Discovery Team.
The screen only displays when multiple On-Prem agents are selected.
Agents v13.1 and above:
These settings are described in Scan Options.
-
Ensure Port 5672 is open for inbound connections at the location of the Discovery Agent.
-
Discovery Agent: Select an agent from the drop-down list.
Note: Distributed scans use the assigned discovery agent to conduct location discovery and provide a queue for all other agents to be assigned locations for scanning.
While the Discovery Agent can be manually chosen, it is recommended that you use the preferred Discovery Agent.
-
Configure Agent IPs: If your organization requires it, you can set a specific IP address.
-
Click Configure Agent IP's. In the Add New IP Address window, type the new IP address and click the plus icon.
-
Hover over the new IP address more options menu and click Make Default.
-
Click Save to apply or Cancel to discard.
Agents v13.0 and legacy Agents, choose from the options:
These options are detailed in Scan Options.
-
Click Next to proceed, Previous to return to the previous screen, or Exit Without Saving
to discard. -
To set up a scan schedule see, How to Set the Date and Time of a Scheduled Scan.
-
Click Next to proceed, Previous to return to the previous screen, or Exit Without Saving
to discard. -
On the Select who should receive notification of scan completion screen, select one:
-
I'll Manually Check My Scans Results
-
Send An Email Notification
-
-
Select a user from the drop-down list or type an email address in the text field and click Enter.
-
To add additional email addresses, click the plus (+) icon and enter the addresses.
-
Click Next to proceed, Previous to return to the previous screen, or Exit Without Saving
to discard. -
On the Summary screen, review your settings and content.

-
Use a edit
icon link to jump to a specific screen. 
-
Click Finish & Save to add the new Scan, Previous to return to the previous screen, or Exit Without Saving to discard.
Create a Database Scan
Procedure:
Note: To establish the connection required to scan a database Target, the relevant driver must be installed on the agent's host system
-
Click the Database tile.
-
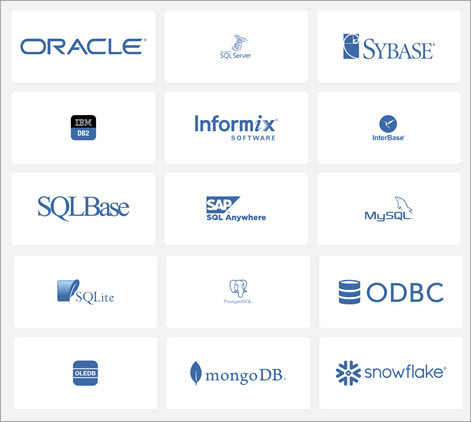
These are the databases available on the Select which database to search screen:
- Oracle
- Sybase
- Informix
- SQLBase
- MySQL
- PostgreSQL
- SQL
- OLEDB
- IBM DB2
- InterBase
- SAP SQL Anywhere
- SQLite
- ODBC
- mongoDB
-
Snowflake
-
Click Next to proceed, Previous to return to the previous screen, or Exit Without Saving
to discard. -
On the Select the agent(s) to perform the scan, click the chevron (>) icon to expand any section.
-
To add an Agent, click the arrow next to the agent name.
-
To remove an Agent, click the arrow next to the agent name.
-
Click Next to proceed, Previous to return to the previous screen, or Exit Without Saving
to discard. -
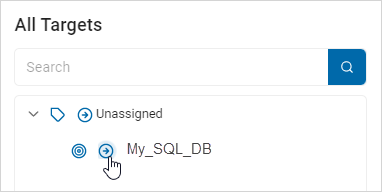
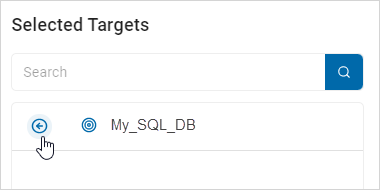
On the Select the target(s) to scan screen, click the chevron (>) icon to expand any section.
-
To add a Target, click the arrow next to the target name.
-
To remove a Target, click the arrow next to the target name.
-
Click Next to proceed, Previous to return to the previous screen, or Exit Without Saving
to discard. -
The next screen is the Select SQL Advanced Options screen. Expand the applicable section for more information:
SQL Advanced Options
-
Fill in the following:
| Name | Description | ||||||
|---|---|---|---|---|---|---|---|
| Include Primary Key Data |
Select one:
|
||||||
| Set Non-Matching cells limit | Type the number of cells in the box. | ||||||
| Exclude Column Types |
Select all applicable:
|
||||||
| Log Level |
Select one:
|
||||||
| Row Count Start-Logging | Type the row count start-logging number. | ||||||
|
Row Count Start |
Type the row count start number. | ||||||
| Row Count Stop | Type the row count stop number. | ||||||
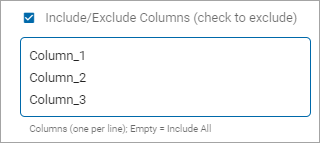
| Scan Column Names |
|
||||||
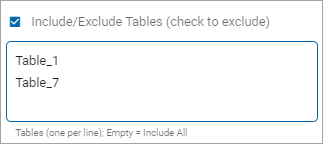
| Scan Table Names |
|
||||||
| Scan Table Types |
Select all applicable:
|
||||||
| Database Preview Link |
Type a number in the box. |
||||||
| Database Preview Max Match | Type a number in the box. |
No SQL Advanced Options (mongoDB only)
-
Fill in the following:
| Name | Description | |||
|---|---|---|---|---|
| Admin Databases |
Select one:
|
|||
| File Attachment Min Size | Type the minimum attachment size required. |
|||
| File Attachment Max Size | Type the maximum attachment allowed size. | |||
| Record Count Stop | Type the record number to stop the scan on. | |||
| Record Min Size |
Type the minimum record size required. |
|||
| Record Max Size | Type the maximum record size allowed. | |||
| Store Min Size | Type the minimum storage size required. | |||
| Store Max Size | Type the maximum storage size allowed. | |||
| Database Min Size | Type the minimum database size required. | |||
| Database Max Size | Type the maximum database size allowed. | |||
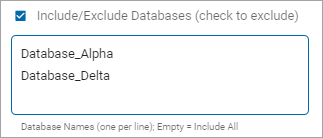
| Database Names |
|
|||
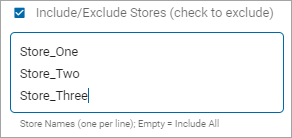
| Store Names |
|
|||
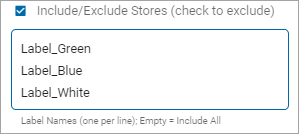
| Label Names |
|
-
Click Next to proceed, Previous to return to the previous screen, or Exit Without Saving
to discard. -
On the Select advanced options screen, additional options are available.
The detailed information about these options is in Scan Options.
-
Click Next to proceed, Previous to return to the previous screen, or Exit Without Saving
to discard. -
On the Discovery Team Settings screen, setup the Discovery Team settings.
Agents v13.1 and above:
-
Ensure Port 5672 is open for inbound connections at the location of the Discovery Agent.
-
Discovery Agent: Select an agent from the drop-down list.
Note: Distributed scans use the assigned discovery agent to conduct location discovery and provide a queue for all other agents to be assigned locations for scanning.
While the Discovery Agent can be manually chosen, it is recommended that you use the preferred Discovery Agent.
-
Configure Agent IPs: If your organization requires it, you can set a specific IP address.
-
Click Configure Agent IP's.
-
In the Add New IP Address window, type the new IP address and click the plus icon. Hover over the new IP address more options menu and click Make Default.
-
Click Save to apply or Cancel to discard.
Agents v13.0 and legacy Agents, choose from these options:
These options are detailed in Scan Options.
-
Click Next to proceed, Previous to return to the previous screen, or Exit Without Saving
to discard. -
To set up a schedule for a scan see, How to Set the Date and Time of a Scheduled Scan.
-
Click Next to proceed, Previous to return to the previous screen, or Exit Without Saving
to discard. -
On the Select who should receive notification of scan completion screen, select one:
-
I'll Manually Check My Scans Results
-
Send An Email Notification
-
-
Select a user from the drop-down list or type an email address in the entry field and click Enter.
-
To add additional email addresses, click the plus (+) icon and enter the addresses or select from the drop-down.
-
Click Next to proceed, Previous to return to the previous screen, or Exit Without Saving
to discard. -
On the Summary screen, review your settings and content.

-
Use a edit
 icon link to jump to a specific screen.
-
Click Finish & Save to add the new Scan, Previous to return to the previous screen, or Exit Without Saving to discard.
Create a Website Scan
Procedure:
-
Click the Website tile.

-
The Select the agent(s) to perform the scan screen opens. Click the chevron (>) icon to expand any section.
-
To add an Agent, click the arrow next to the agent name.
-
To remove an Agent, click the arrow next to the agent name.
-
Click Next to proceed, Previous to return to the previous screen, or Exit Without Saving
to discard. -
On the Select the target(s) to scan screen, click the chevron (>) icon to expand any section.
-
To add a Target, click the arrow next to the target name.
-
To remove a Target, click the arrow next to the target name in the Selected Targets column.
-
Click Next to proceed, Previous to return to the previous screen, or Exit Without Saving
to discard. -
On the Select website options screen, choose from these options. They are detailed in the Scan Options.

-
Select the Advanced Options button at the top of the screen. When done you can select the button again to return to the previous screen.
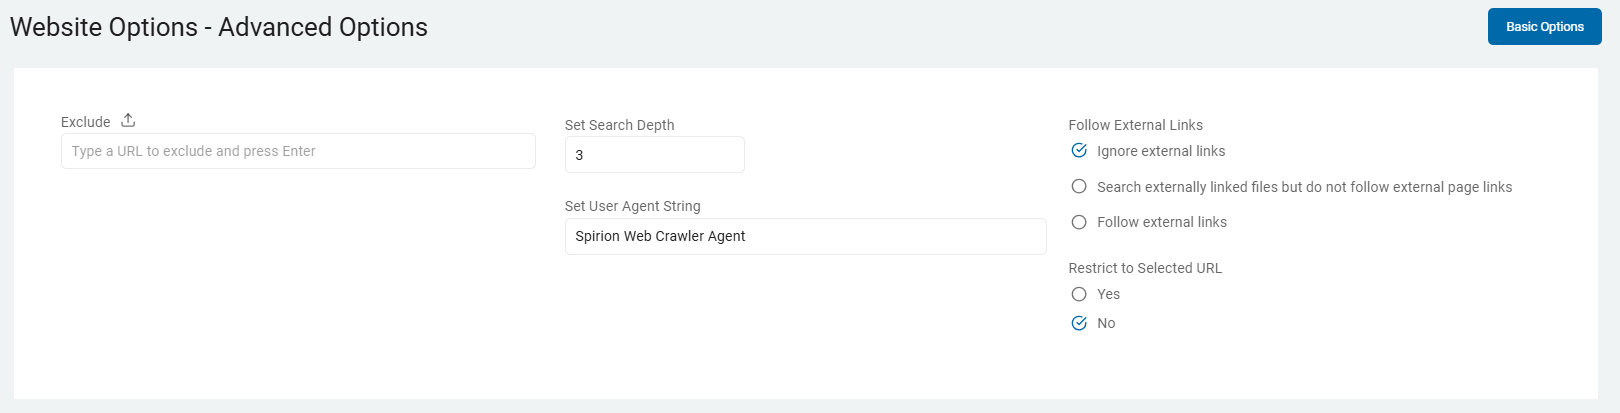
These options are detailed in Scan Options.
-
Click Next to proceed, Previous to return to the previous screen, or Exit Without Saving
to discard. -
The next screen is the Select file type scan options which are Basic Options At the top of the screen is another Advanced Options button.
-
The basic options are detailed in Scan Options.
-
The Advanced Options are also detailed in Scan Options.
-
Click Next to proceed, Previous to return to the previous screen, or Exit Without Saving
to discard. -
The Select advanced options screen provides additional options to choose from.

These options are detailed in Scan Options.
-
Click Next to proceed, Previous to return to the previous screen, or Exit Without Saving
to discard.
To set up a scan schedule see, How to Set the Date and Time of a Scheduled Scan.
-
Click Next to proceed, Previous to return to the previous screen, or Exit Without Saving
to discard. -
On the Select who should receive notification of scan completion screen, select one:
-
I'll Manually Check My Scans Results
-
Send An Email Notification
-
-
Select a user from the drop-down list or type an email address in the entry field and click Enter.
-
To add additional email addresses, click the plus (+) icon and enter additional addresses.
-
Click Next to proceed, Previous to return to the previous screen, or Exit Without Saving
to discard. -
On the Summary screen, review your settings and content.
-
Use the edit
icon link to jump to a specific screen. 
-
Click Finish & Save to add the new Scan, Previous to return to the previous screen, or Exit Without Saving to discard.